Lorem ipsum dolor sit amet, consectetur adipiscing elit. Suspendisse varius enim in eros elementum tristique. Duis cursus, mi quis viverra ornare, eros dolor interdum nulla, ut commodo diam libero vitae erat. Aenean faucibus nibh et justo cursus id rutrum lorem imperdiet. Nunc ut sem vitae risus tristique posuere.
This is some text inside of a div block.
Report Scheduler: You can now schedule reports to send to your employees.
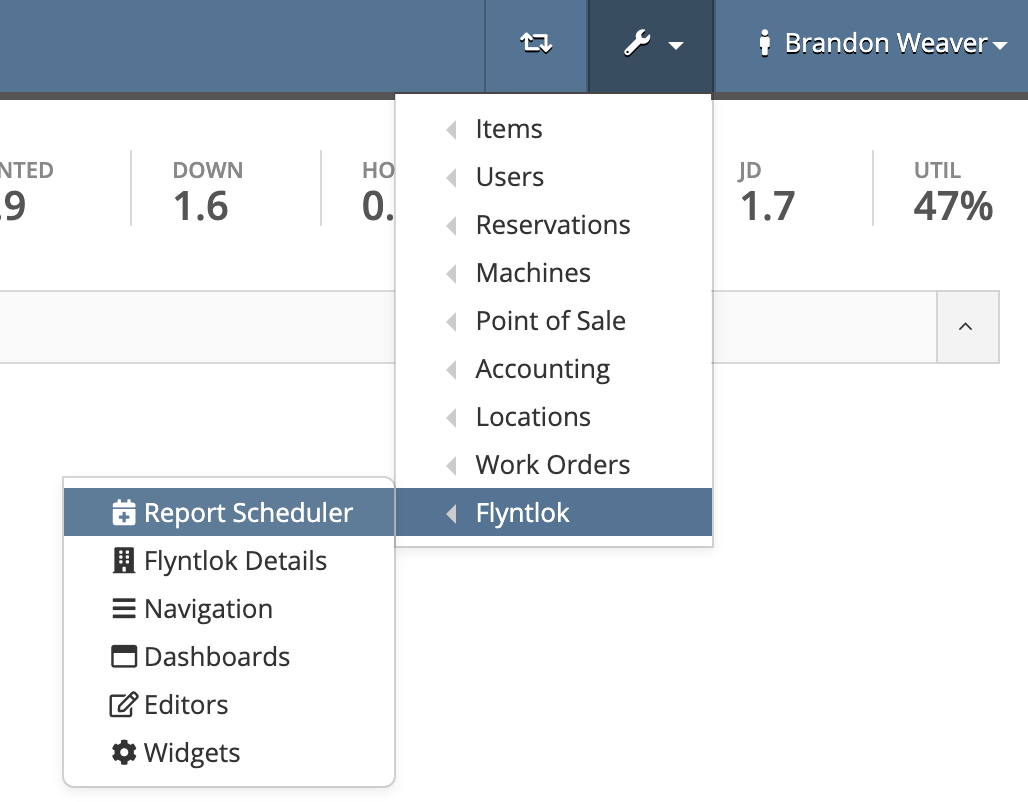
First, go to your administration editors drop-down (wrench icon) and click 'Report Scheduler'.
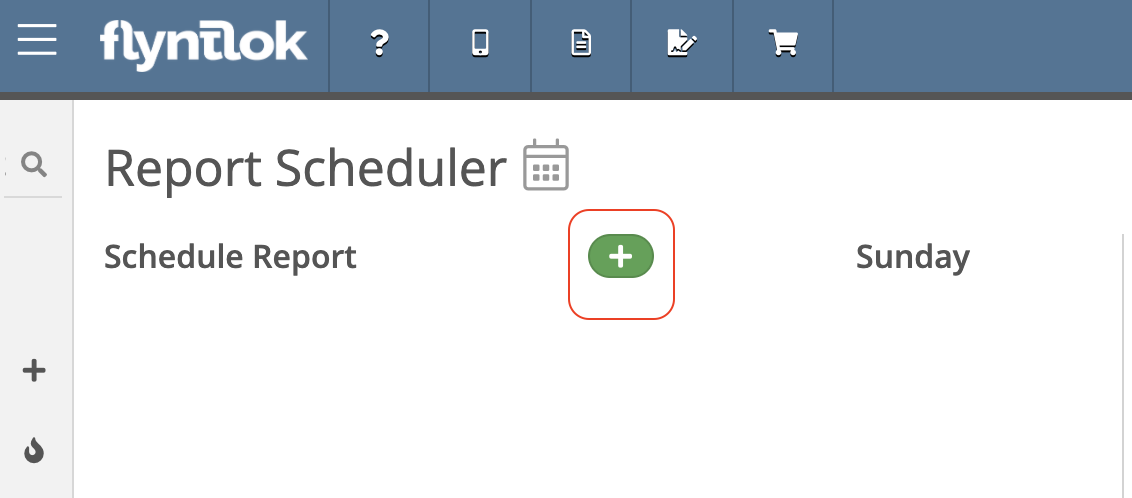
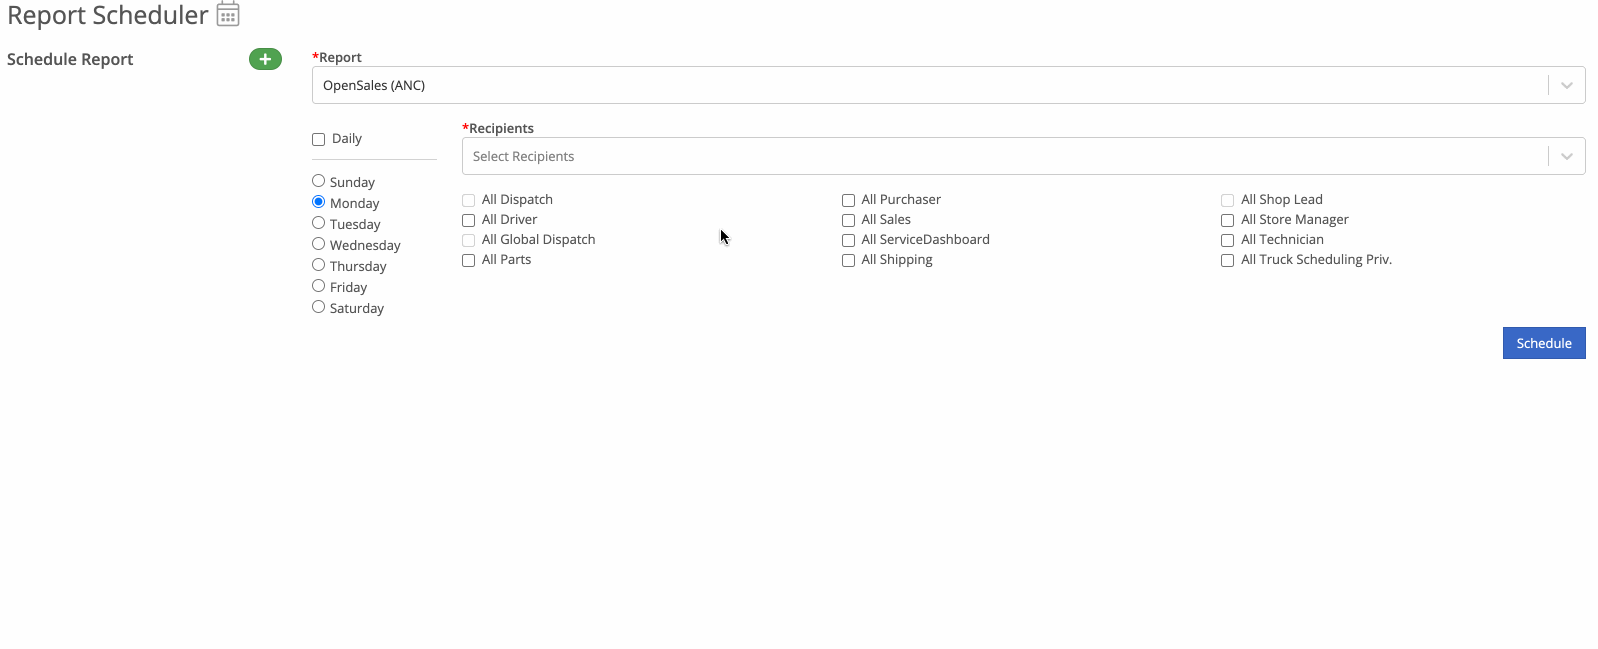
Now, click the green plus button and choose the report you want to schedule.
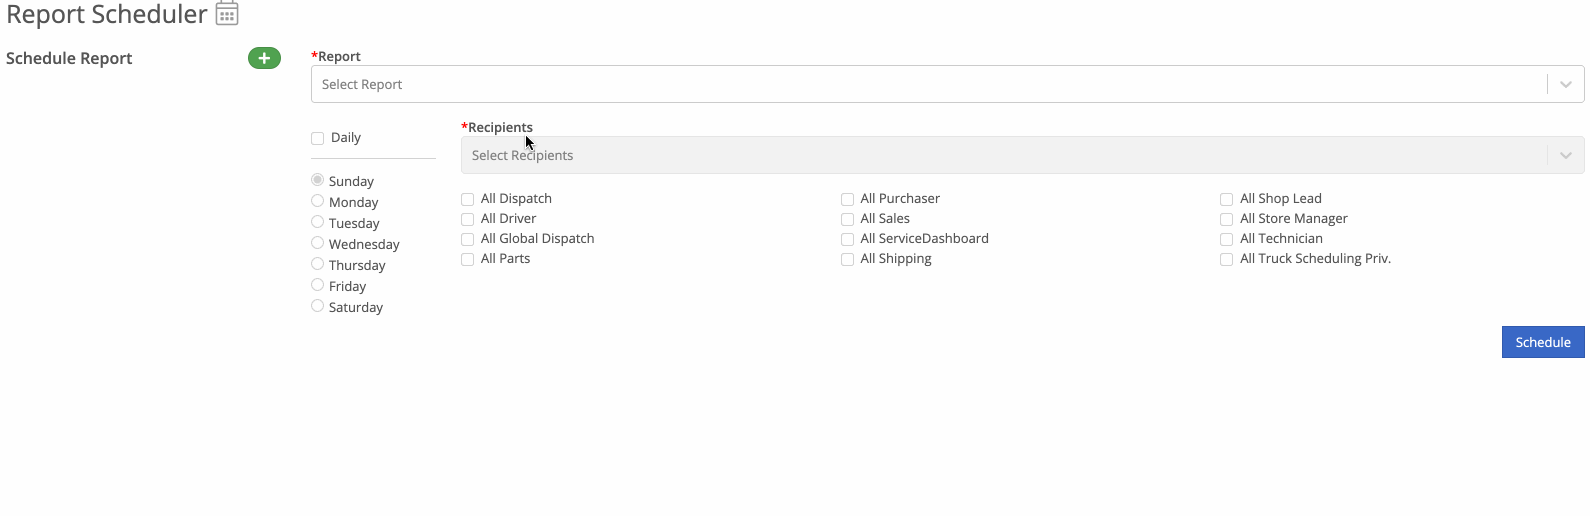
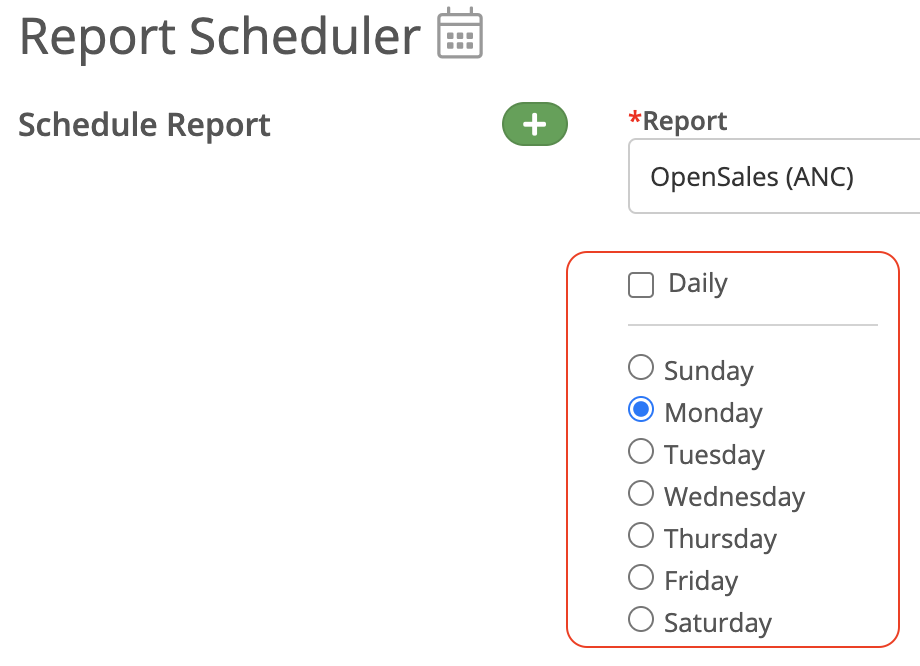
Next, choose when you want to send the report.
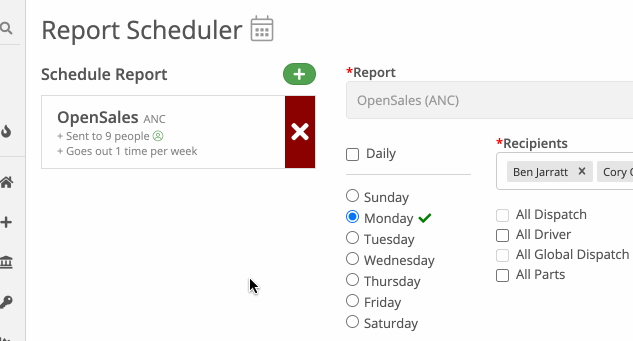
Finally, select the recipients that will be receiving the report and click the blue 'Schedule' button.
You can select groups of employees by checking the user group listed. This will add all users under that group to the recipient field.
The green check next to a day of the week means there are recipients receiving the report on that day. You CAN send reports multiple days a week
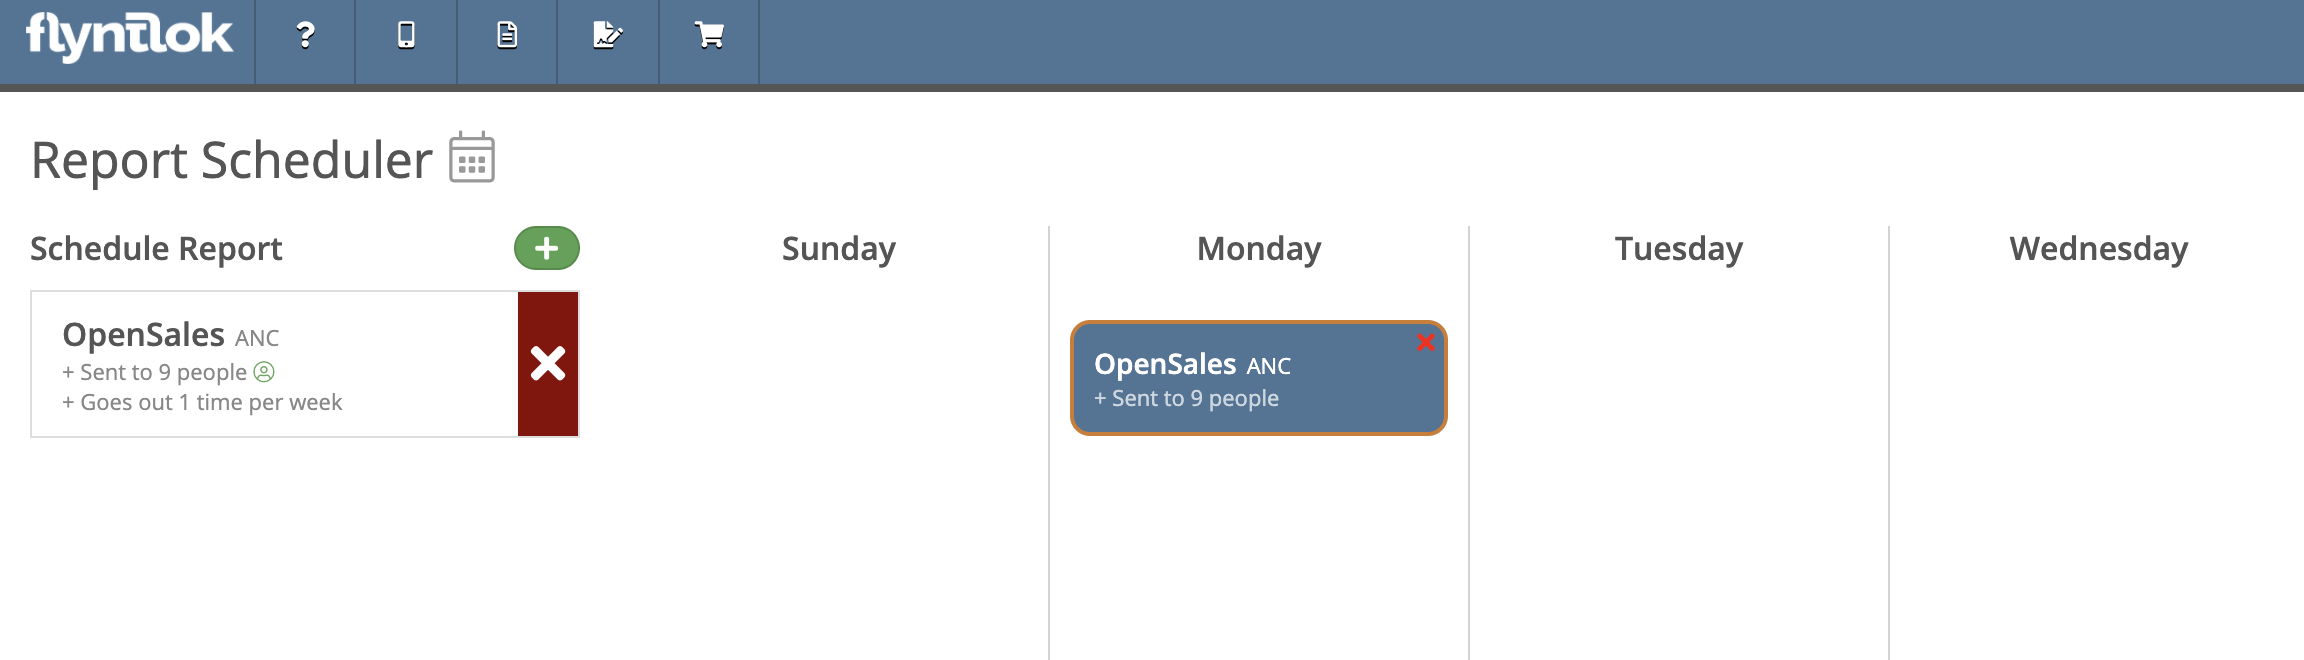
You can see a list of reports being sent under "Schedule Report", you can also click the calendar icon to see a calendar view.
Flyntlok Details: All details associated with your business's Flyntlok account.Navigation: You can manage your employee's left-hand navigation bar from here.Dashboards: The dashboards for all your companies users can be edited and setup from here. See below for a step-by-step tutorial on how to create a new dashboard.
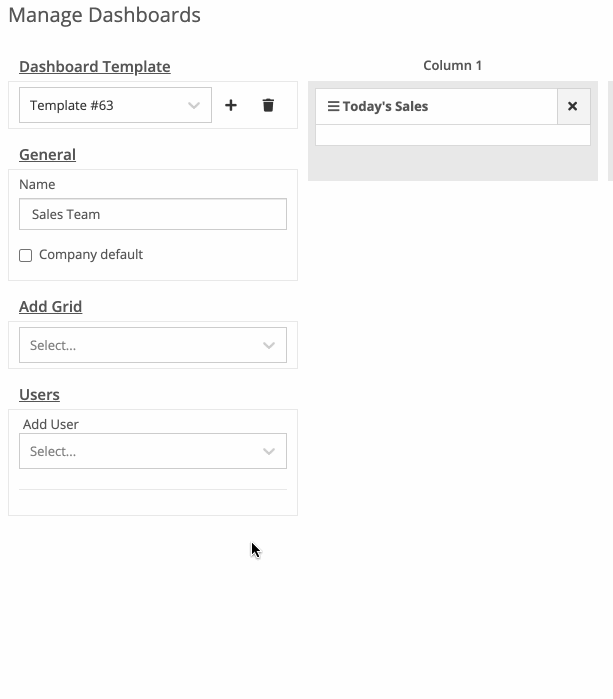
Open the Dashboard Template drop-down to see all of the dashboard templates. You can also click the '+' icon to create a new template and rename it below 'General'.
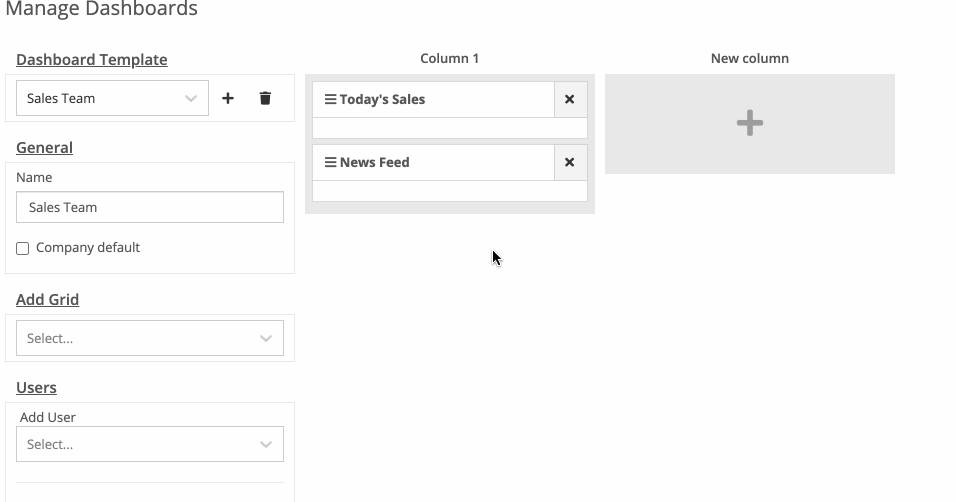
Next, you can add grids to the template. Notice it's added to column 1.
Now, you can assign users to this template. (You can add users to existing templates as well!)
Finally, you can drag and drop the grids to different columns.
Editors: This allows you to edit who has access to each admin editor.Widgets: Various widgets that make your life a little bit easier! Things like "Item Merge", "Customer Merge", and more can be found here.
Table of Contents
Related Posts
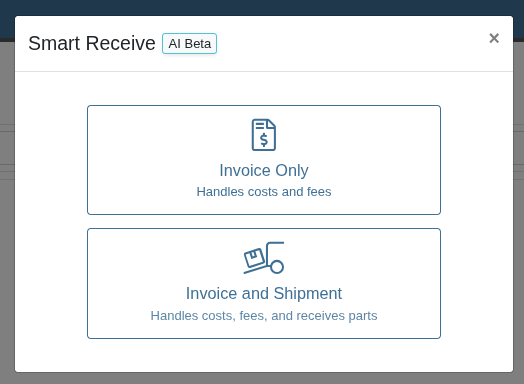
Smart Receive Guide
Tax System Update
Bobcat Online Parts Counter Integration Setup Guide


.svg)
.svg)