Service
New Feature
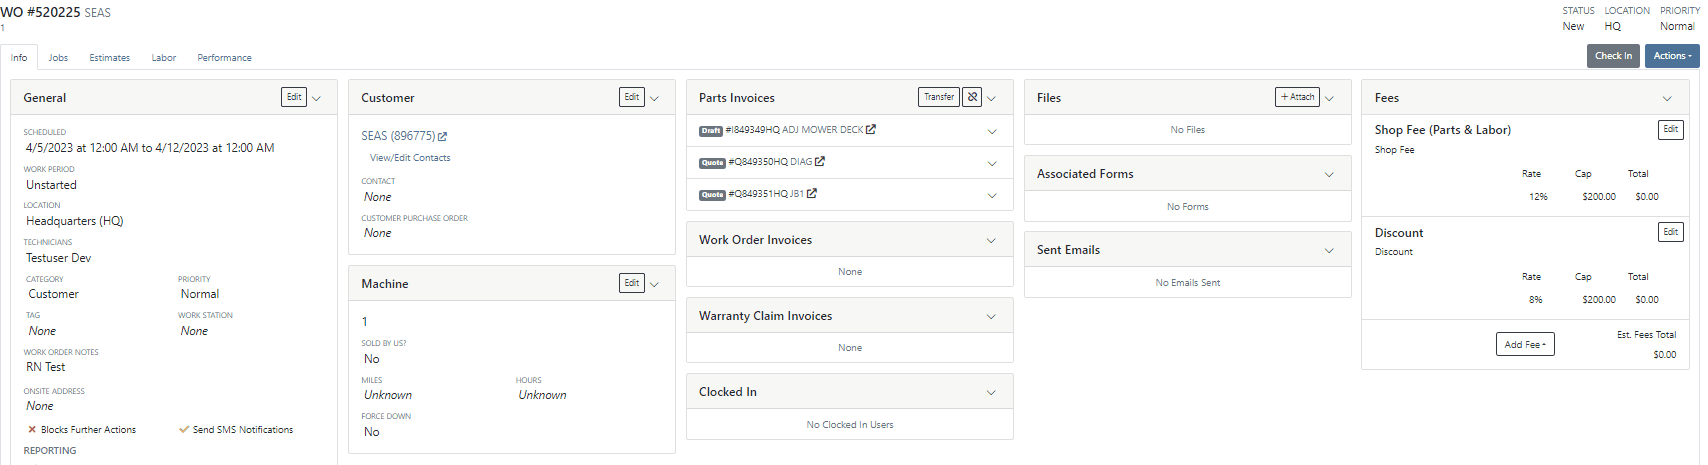
Work Order Estimates
We have added a new setting to the work order to make the job approval processing quicker. From the Jobs Tab of the Work Order dashboard, you will see a new option in the Actions dropdown titled Process Jobs. When clicked, you will see a list of your jobs, allowing you to select and process the part orders associated with the jobs.
When the process button is selected, Flyntlok will move the internal parts orders tied to the selected job(s) forward from a Quote or Draft status into a Pending or Pickup status.
Enhancement
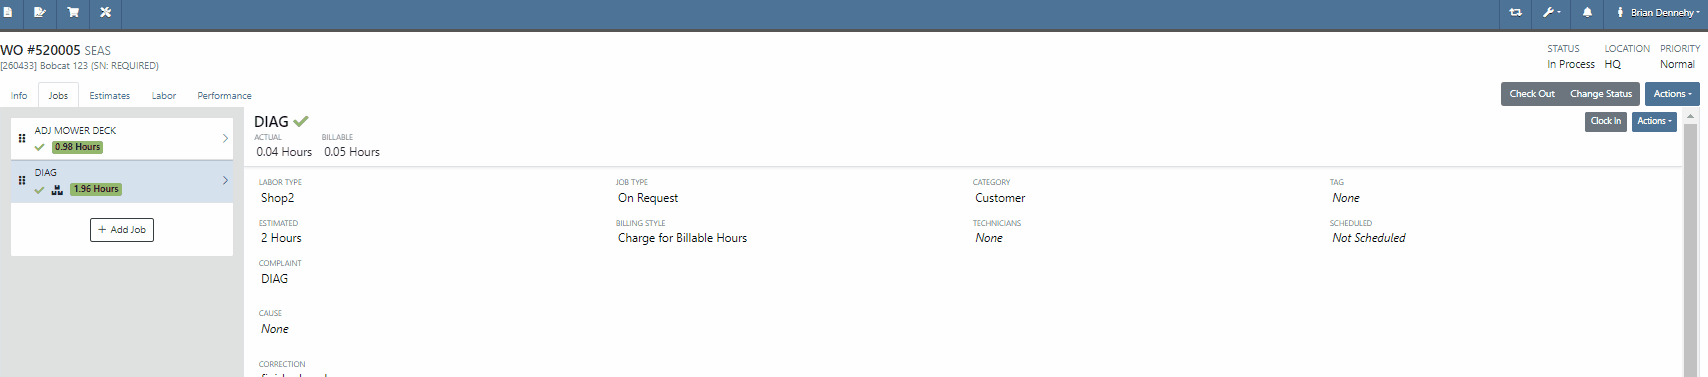
Visibility on Tech Clock Out Notes
When a technician clocks out of a job, Flyntlok requires them to log a note. You will now be able to view this note from the corresponding labor punch. From the Labor Tab of the Work Order, you will now see a new Note Icon on the labor punches. When you hover over this new icon, Flyntlok will display the tech note added at that clock-out.
Point of Sale
Enhancement
Credit Card Information
We have added additional Credit Card information to the Sales Order. When adding a customer credit card as a payment type, you will now see the card number, the name on the card, the date the payment was taken, and the approval number populate on the payment line of the Sales Order and the Sales Order PDF.


Machines
Enhancement
Model Update
We will now tell you what fields will be changed on the model when updated from a machine. 
Machine Flooring
New feature
Closing a Voucher/Booking Corresponding machine Transaction
We have added new settings to the Machine Receiving Voucher, you will now be able to generate a new journal entry to put the machine into a flooring account! When the QB flooring field is set on the receiving voucher, Flyntlok will now generate a journal entry for the machine instead of creating a bill. We recommend also setting the category (Floored) checked to indicate yes. This will allow Flyntlok to create new reports on the floored machine. Please reach out to the Flyntlok support team to review this workflow!
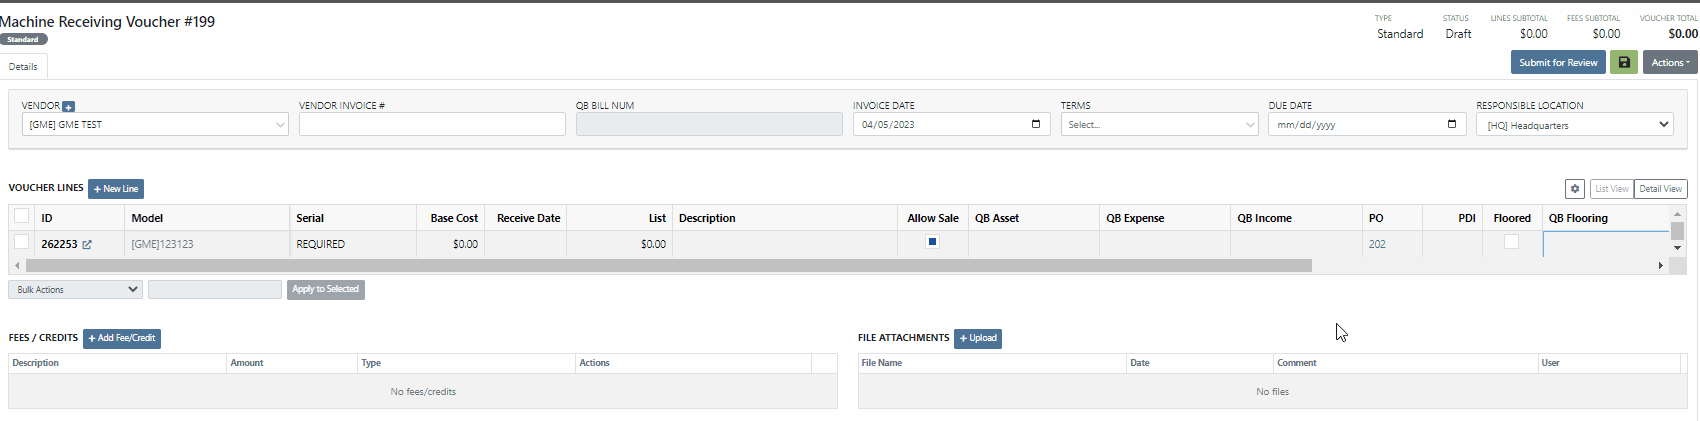
This information will immediately populate the machine's balance sheet, viewable from the machine's dashboard.

Machine Purchase Orders
New feature
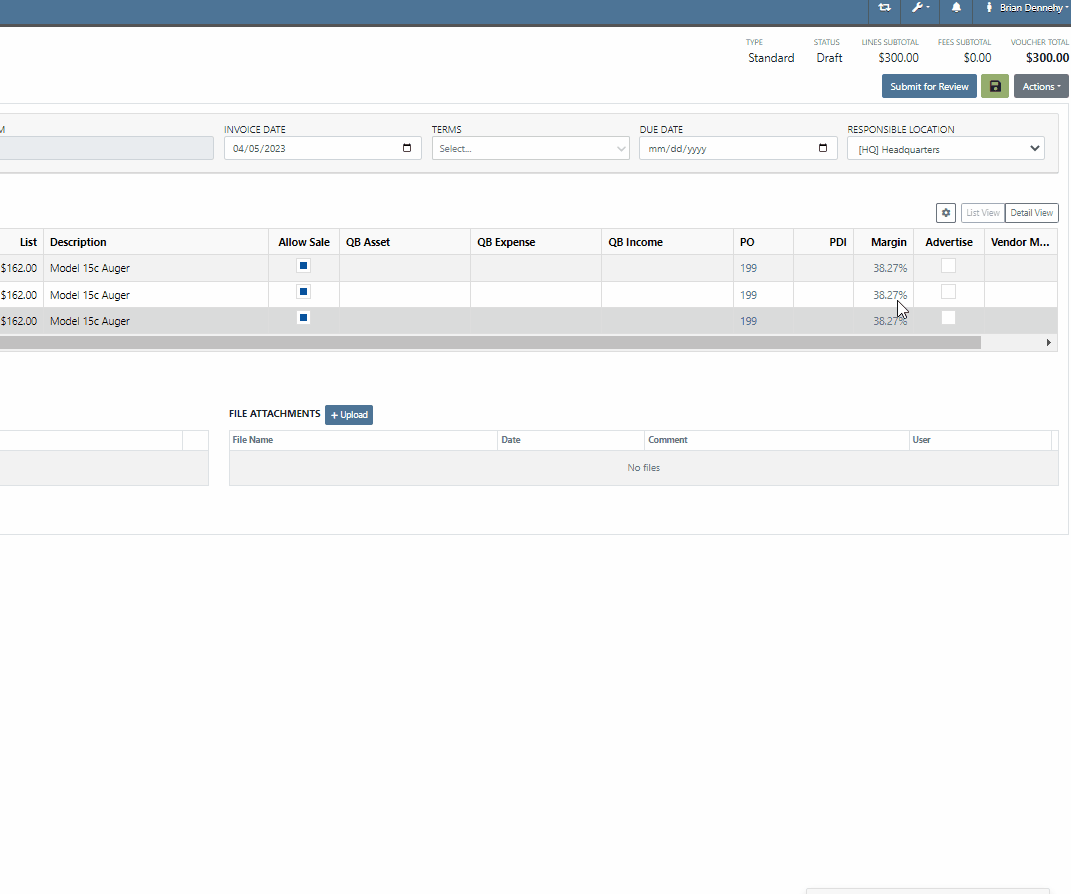
Machine Miles/Hours
We have added the Machine Miles and Hours categories to the column chooser of the Machine Receiving Voucher.
Rental
Enhancement
Call-Off Date Visibility
We have updated the settings of the rental contract call-off. When a rental contract is called-off, invoicing uses the call-off date if it exists; (otherwise uses check-in date.) The Call-Off date will now populate on all relevant rental PDFs and lease agreements.


Tax
Enhancement
Customer Dashboard Tax
We have updated the Tax Rules pop-up on the customer's dashboard. This will make configuring a customer's tax rules easier.
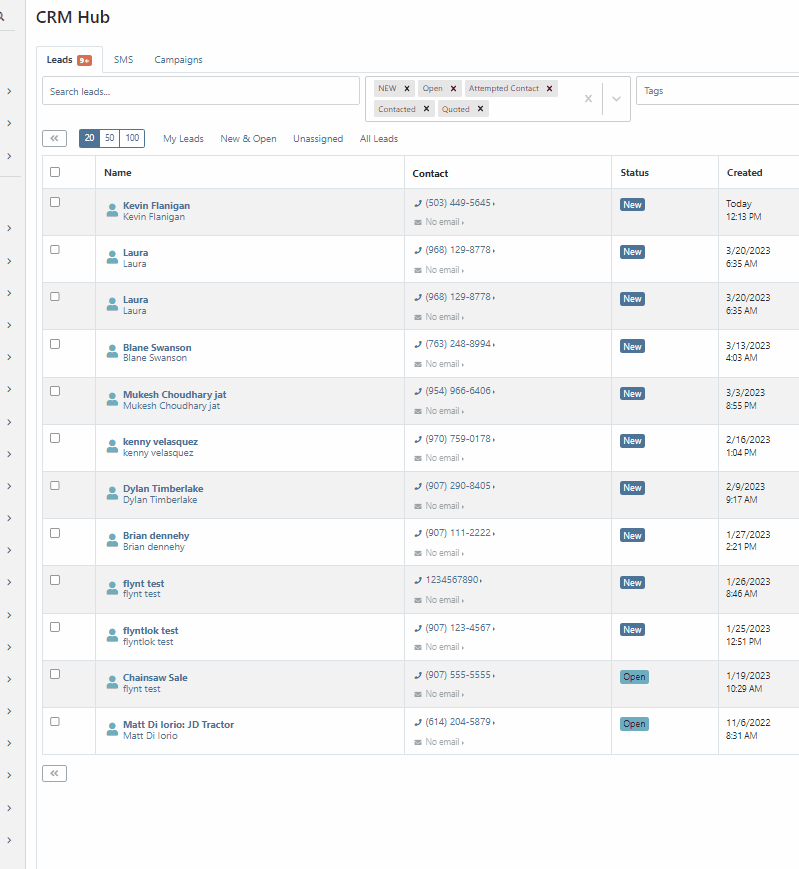
CRM Hub
New Feature
Attach Files, Photos, and Videos
You will now be able to send files such as PDFs, Photos, or Videos to new leads when communicating with them via SMS.
Not yet a Flyntlok Customer?
Learn More at Flyntlok Dealer Management System
YouTube
Check out our Flyntlok YouTube channel for more highlights of the application!
Actions
The Point of Sale includes all necessary Actions and Features that provide customers with a wide range of options when checking out. Many of the POS features can be found by their relatable icon in the top right corner including Reverse Line-Item Order, Email SO Sheet, Print SO Sheet, View Packing Slip, Apply Percentage Discount to the Entire SO, View Internal Pricing Information, Fulfill as Many Items as Possible, Modify Tax Rules, Adjust Payment Posting Dates, Most Commonly Sold Items, Sell a Machine, Export to Excel, and Create Label.
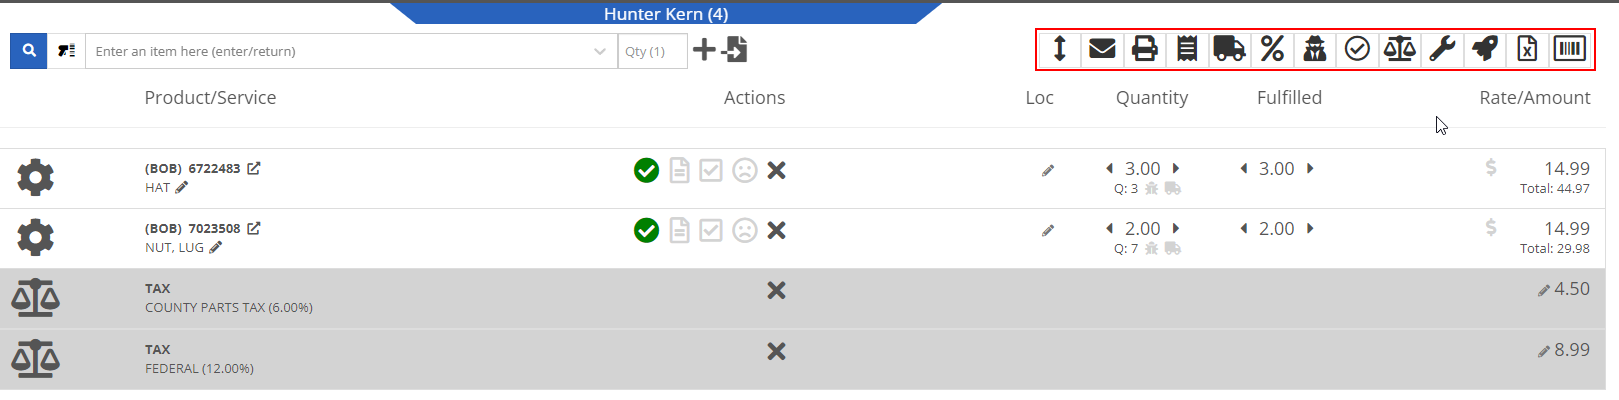
How to Reverse Line-Item Order
To Reverse Line-Item Order, click  in the top right corner of the POS. Once clicked, item lines will reverse order in POS table.

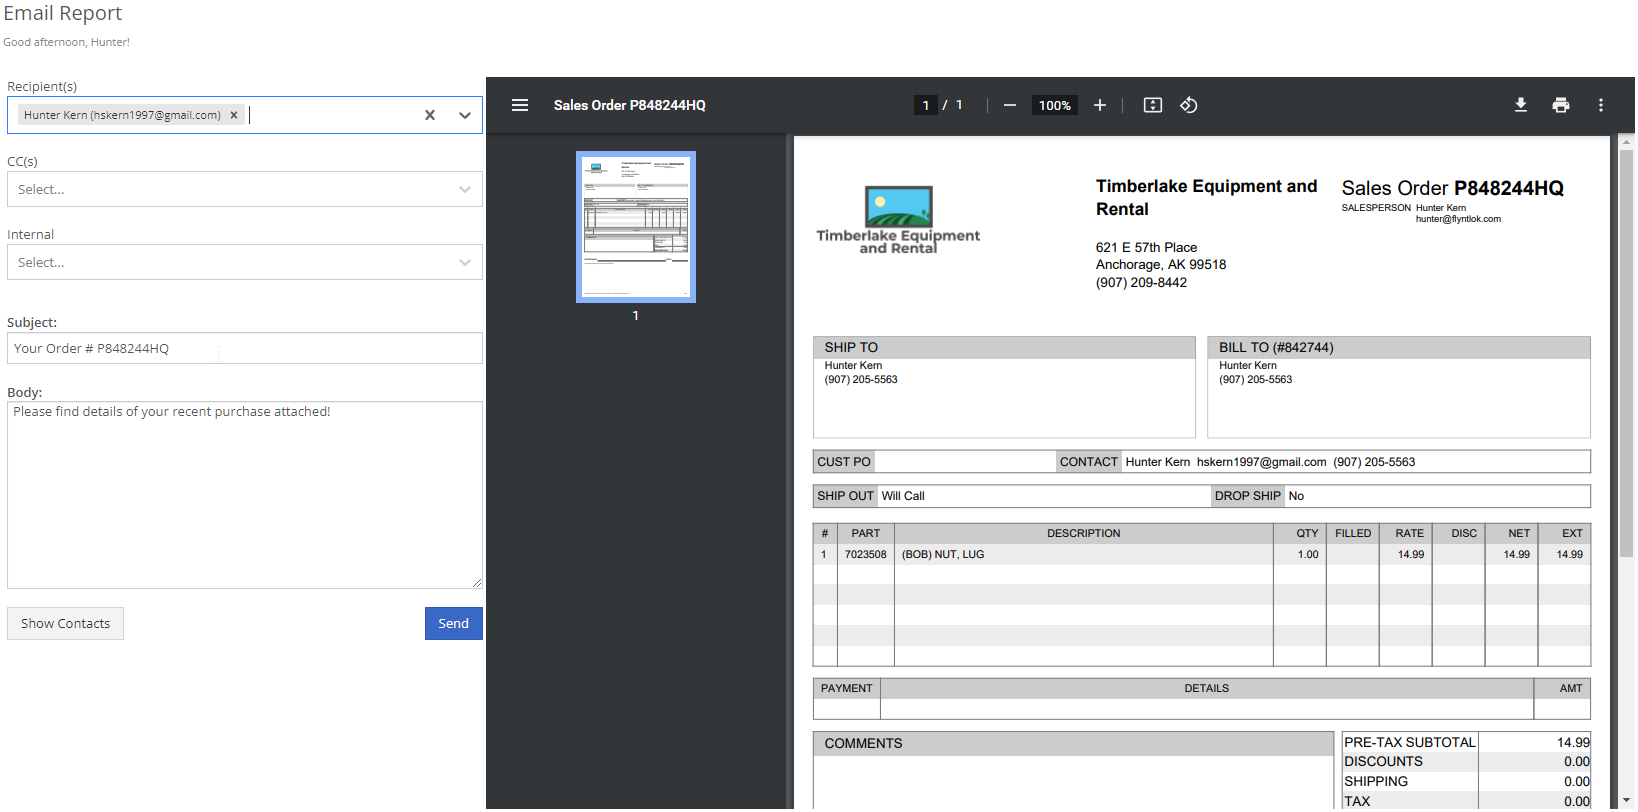
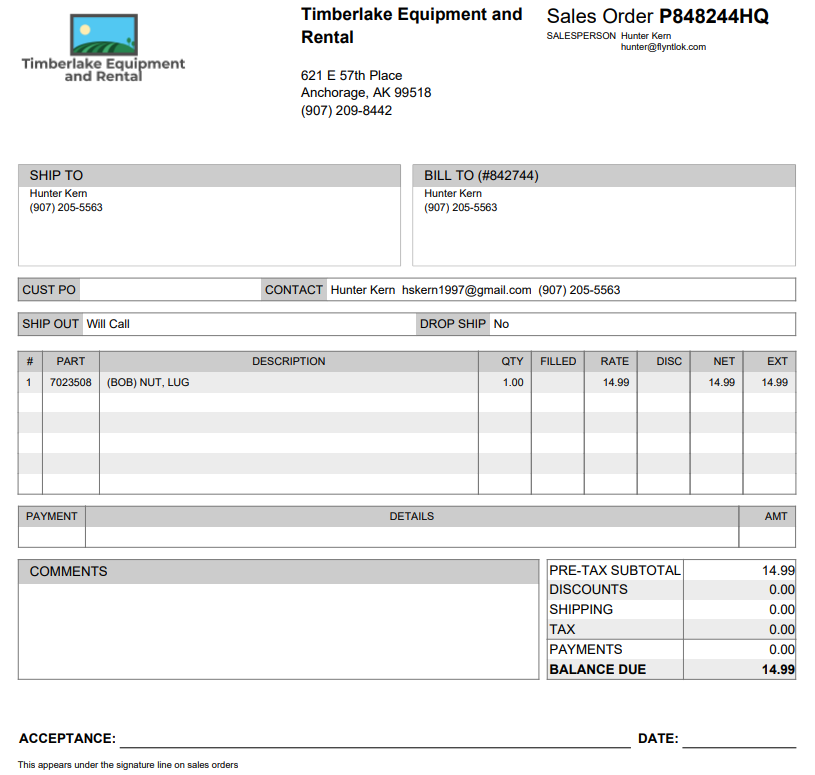
How to Email Sale Order
To email the Sale Order, click  or press the hotkey E when on the Point Of Sale.
- After clicking, an Email Report will open in a new tab that includes default email options such as recipients and subjects as well as a display of the SO Sheet
- The SO Sheet includes a heading that has company, basic SO and Salesperson information
- The body of the SO includes shipping, billing, customer PO, contact, item list, and payment information
- After reviewing the email and SO sheet, click the Send button and the email will be sent within 5 minutes.

How to Print Sale Order Sheet
To print SO sheet, click  .
.
- After clicking, the page will redirect to a printable SO sheet
- The SO sheet, same as the sheet created when emailing, includes a heading that has company, basic SO and salesperson information
- The body of the SO includes shipping, billing, customer PO, contact, item list, and payment information
- Choose the print or download options in the top right corner of the page to continue

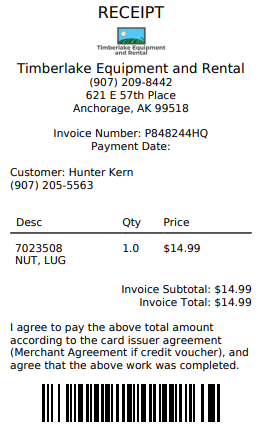
How to Print Sale Order Receipt
To print SO receipt, click  .
.
- After clicking, the page will redirect to a printable SO receipt which includes company, basic SO, invoice, date, and customer information
- The body of the receipt includes descriptions, quantities, and price information, invoice subtotal, tax and total amounts as well as an ID number in a barcode form
- The SO is easily accessible by scanning the barcode ID in Flyntlok’s search bar
- When on the receipt page, choose the print or download options in the top right corner of the page to continue

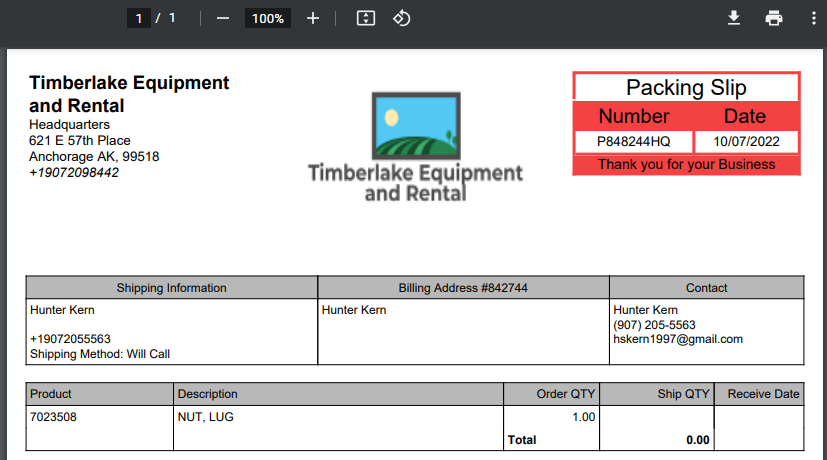
How to Create a Packing Slip
To create a Packing Slip, click  .
.
- After clicking, the page will redirect to a printable Packing Slip
- The Packing Slip heads with company, basic SO, invoice, date, and customer information
- The body of the slip includes addresses, product, descriptions, order quantities, ship quantities, and receive dates
- Choose the print or download options in the top right corner of the page to continue

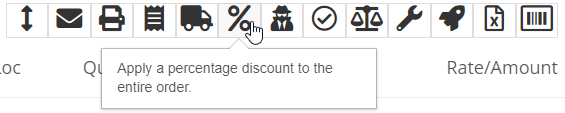
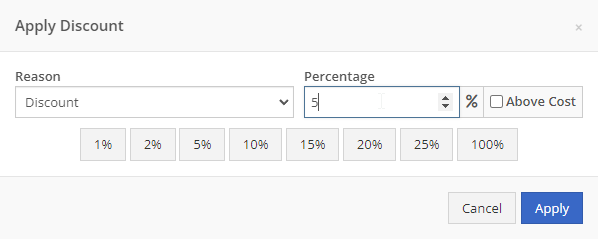
How to Apply Percentage Discount to the Entire Sale Order
To apply a percentage discount to the entire order, click  .
.
- After clicking, a pop-up page will appear prompting a discount to be applied
- Fill in the appropriate reason and percentage, and check above cost if selling a specific percentage above the cost of an item
- After selecting the correct discount information, click Apply and the discount will appear as its own item line on the POS
- The amount docked from the total order will appear in the far-right cell under Rate/Amount
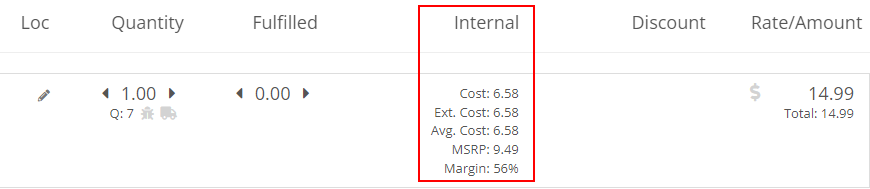
How to View Internal Pricing Information
To view internal pricing information, click  .
.
- After clicking, two new columns, Internal and Discount, will appear in the POS table
- The Internal and item line cell will display cost, extended cost (ext. cost), average cost (avg. cost), and MSRP
- The Discount and item line cell will display the discount applied to the specific item.

How to Fulfill as Many Items as Possible
To fulfill as many items as possible, click  .
.
- After clicking, all items with sufficient inventory quantities for ordered quantities will be fulfilled
- Quantities in the fulfilled column will change to their correctly fulfilled value, and a green check mark will appear in the Actions column of each completely fulfilled item
- No check mark will appear if item was only partially or not fulfilled at all


How to Modify Tax Rules
To modify tax rules, click  .
.
- After clicking, a pop-up menu will appear prompting to edit tax rules
- Use the search bar to search for tax types in this menu, then select the checkbox next to all applicable tax types
- If all listed tax types are applicable, click the top checkmark box just left of where it says tax type
- If there are exemptions, select them in the tab-down menus to the right of each tax type
- Click the Save to Customer button and confirm the notification to save the tax types to the customer associated with the SO


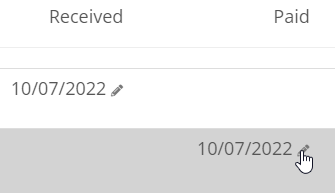
How to Adjust Payment Posting Dates
To adjust payment posting dates, click  .
.
- After clicking, two new columns, Received and Paid, will appear in the POS table
- The Received and item line cell contains a date that can be edited by clicking the pencil icon
- The Paid and Payment line cell also includes an editable date

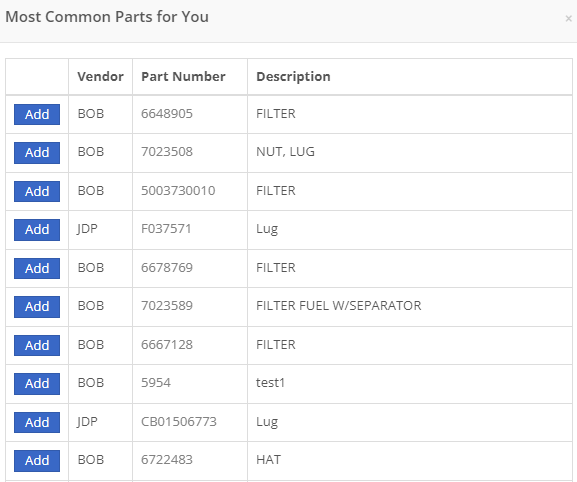
How to view Most Commonly Sold Items
To view most commonly sold items, click  .
.
- After clicking, a pop-up page will appear displaying the most common parts associated with the customer
- Adding commonly purchased items can be done by clicking Add buttons left of each item
- Item dashboards can be accessed by clicking on each item’s part number

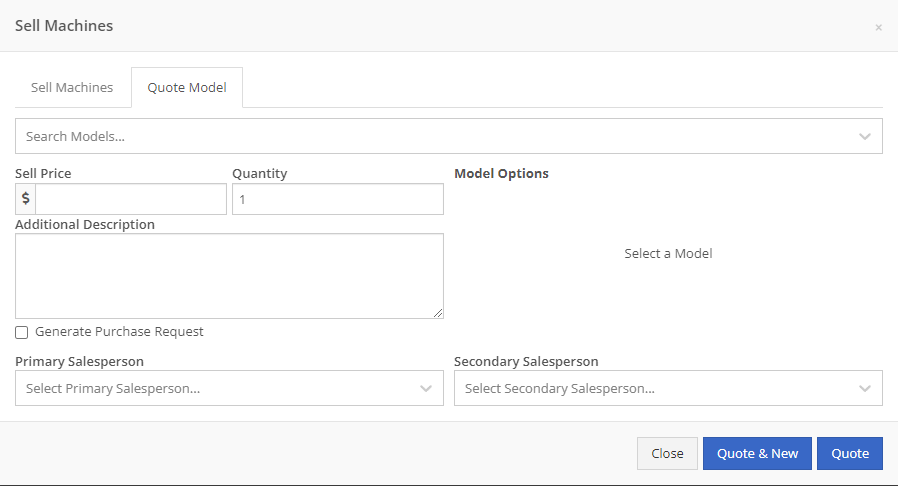
How to Sell or Quote a Machine
To sell a machine, click  .
.
- After clicking, a pop-up page, Sell Machines, will appear
- Use the search bar to enter a machine, as well as the tab down menus to select primary and secondary salespeople
- Click the Add icon to create a new machine, and then the Sell or Sell & New buttons to add the machine to the SO


Another option in the Sell Machines page is quoting a machine
- To do this, click the Quote Model tab and enter all necessary model, price, and quantity information
- If a purchase request is required, select the Generate Purchase Request box
- Then, click the Quote & New or the Quote buttons
How to Export to Excel
To export to Excel, click  .
.
- After clicking, a file automatically downloads from the browser and can be opened with spreadsheet applications such as Excel, and google sheets
- Once opened, a spreadsheet is automatically created with 7 headers: Vend, Product/service, Description, Qty, Fulfilled, Rate, and Amount
- All lines of the SO, such as item lines, machine, discount, tax, shipping & handling, and payment will populate in the spreadsheet


How to Create Label
To create a label, click  . The tab will redirect to a .php file that lists all Labels for each item on the Purchase Order, as well as the optionable QR Code, or Barcode.
