How Can We Help?
Flyntlok has redesigned the rental system to make it more user-friendly. It also allows you to rent items in addition to machines.
Rental Screens
The rental system consists of 3 screens:
Rental Creation Screen:
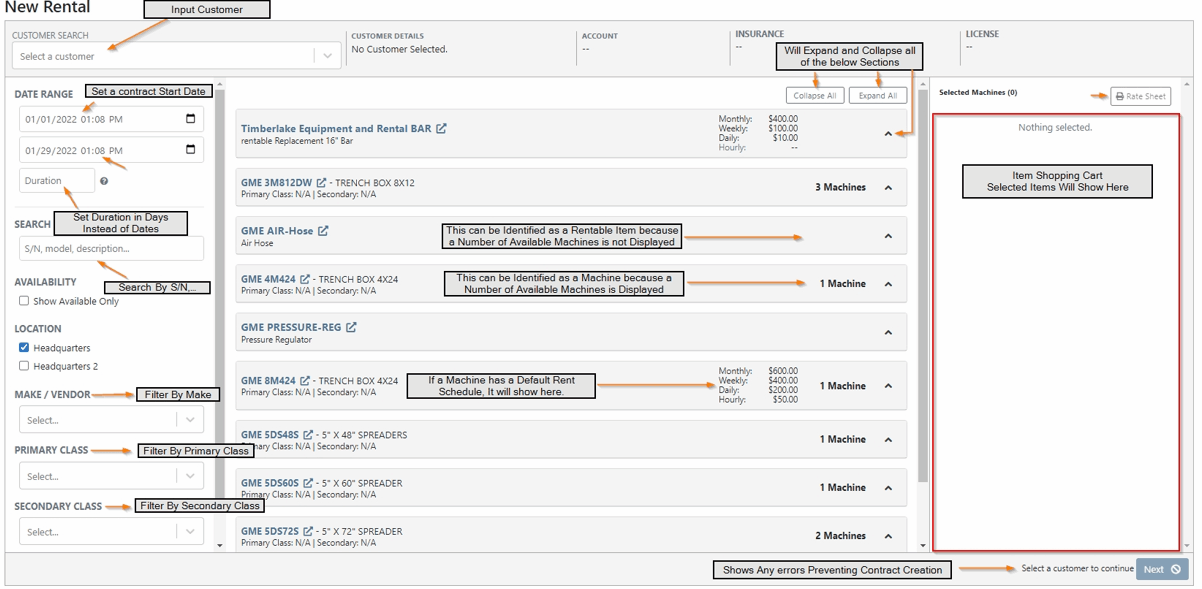
This screen is the place to go when a customer calls. After you set a date range, the list will only show the equipment available during that period. If you have the equipment that your customer is needing, you can build the shopping cart and continue to the next step!
Additional Details Screen:
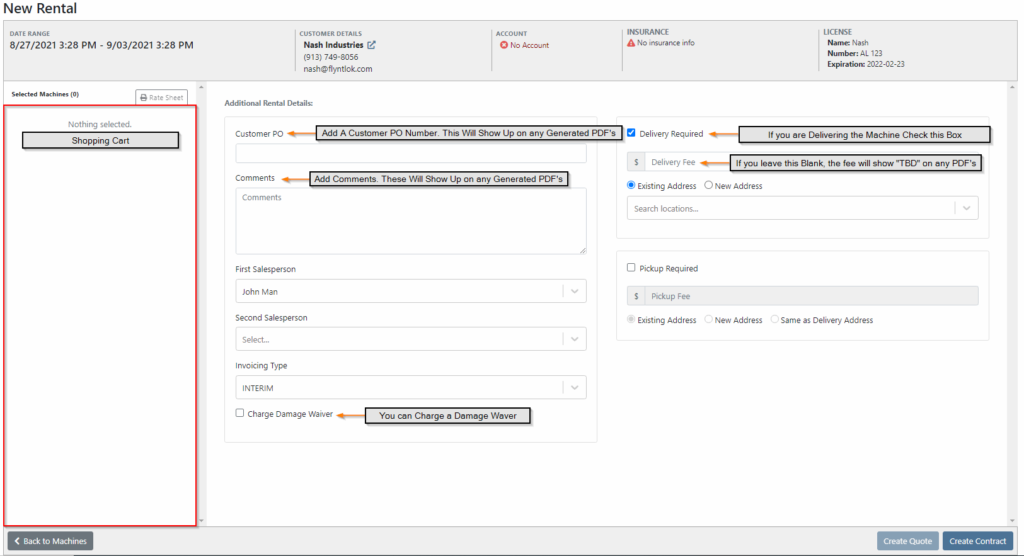
When a customer wants to move forward with a rental. You may need to add additional details to the contract such as a PO number, delivery/pickup information, and other comments.
Rental Contract Screen:
This is a digital representation of the rental contract.
Lets Create a Rental!
When a customer calls you will want to start on the new rental page. The first information that you'll need is the rental duration. This is the expected amount of time that the equipment will be on rent. This can be changed at any time during the life of the contract. You can either input your own dates or use the duration field to have Flyntlok calculate them for you!

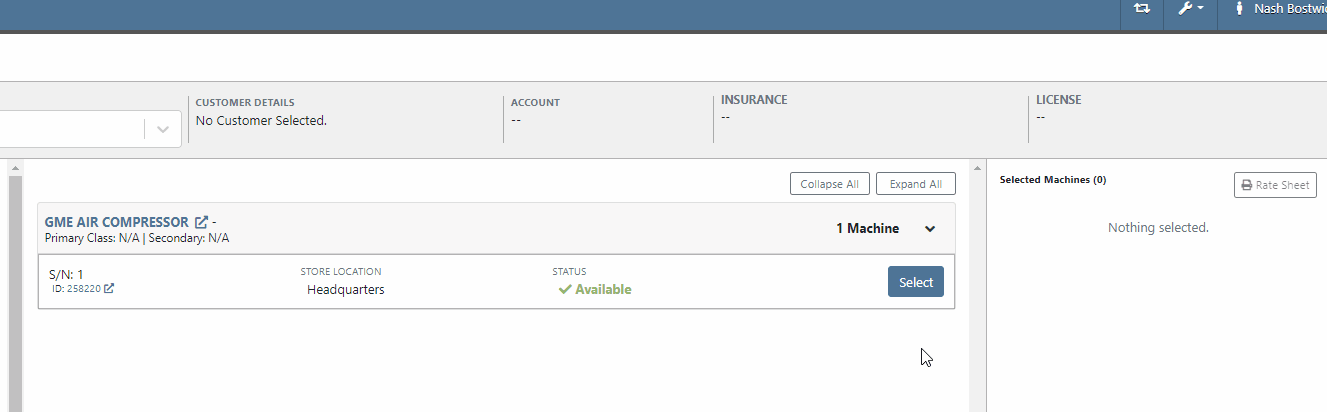
Now that we have our days filled out we can find the machine we want to rent. I know that the vendor I want is GME. So I will use that as the filter. I am going to add an air compressor, air hose, and pressure regulator to the contract. Note: The Air Compressor has a serial number, so it is a machine. The hose and regulator are items because they are not tracked by serial number.
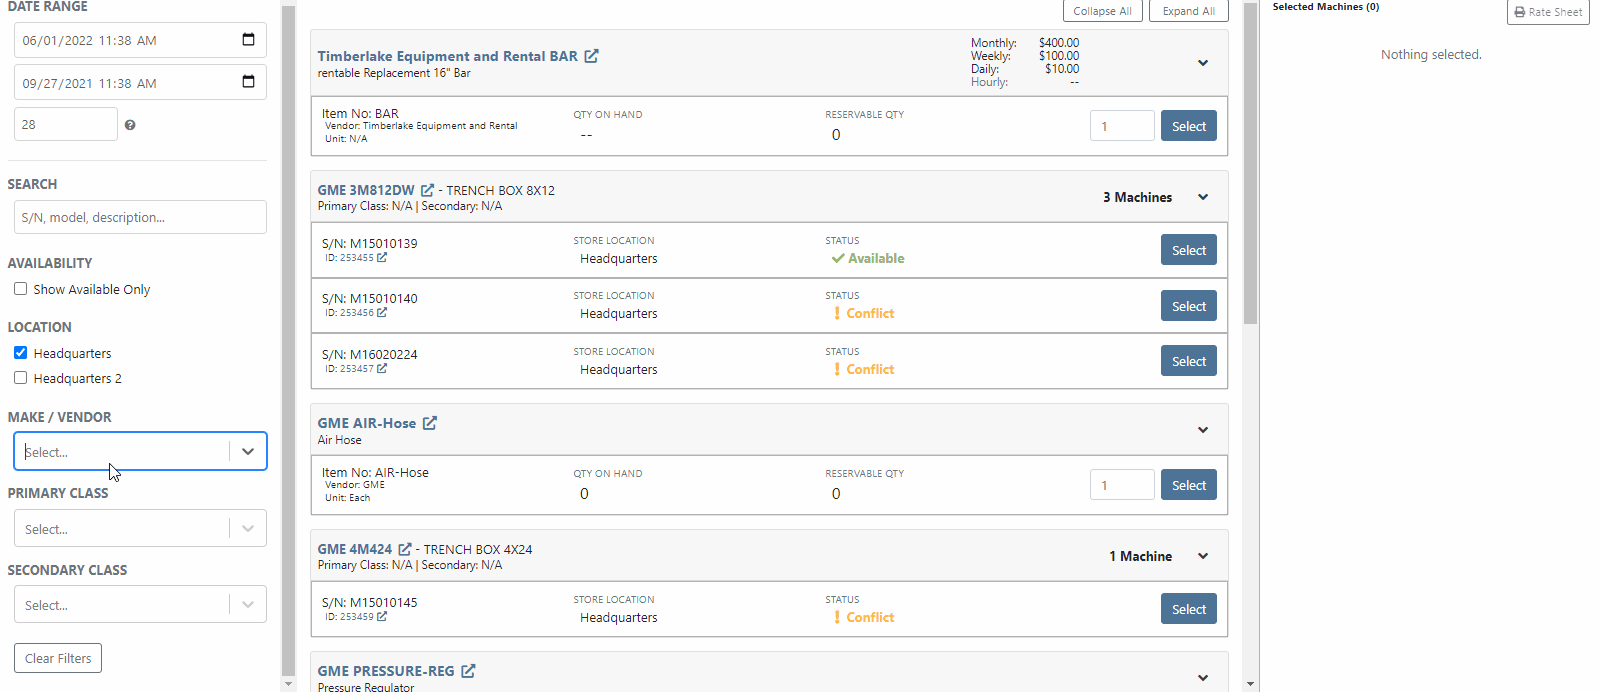
It looks like all the equipment is available for rent. Now, lets add a customer and proceed to the next screen.

This is the screen where you can add additional details to the contract. Such as a PO number, salesperson, comments, and delivery/pickup information. After you have all of the details typed in, you can click Create Contract.

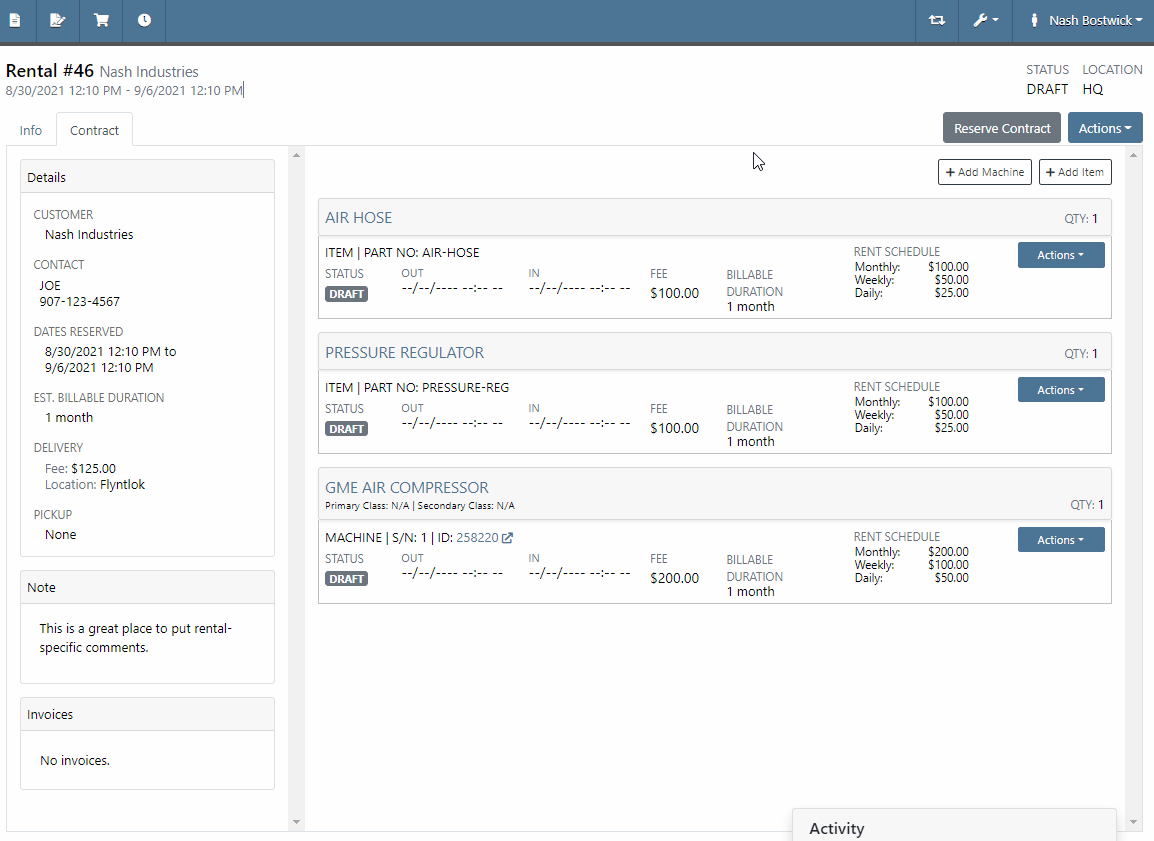
You will then be directed to the contract page. This shows machines and other contract information. If you would like to see more detail click the Info Tab


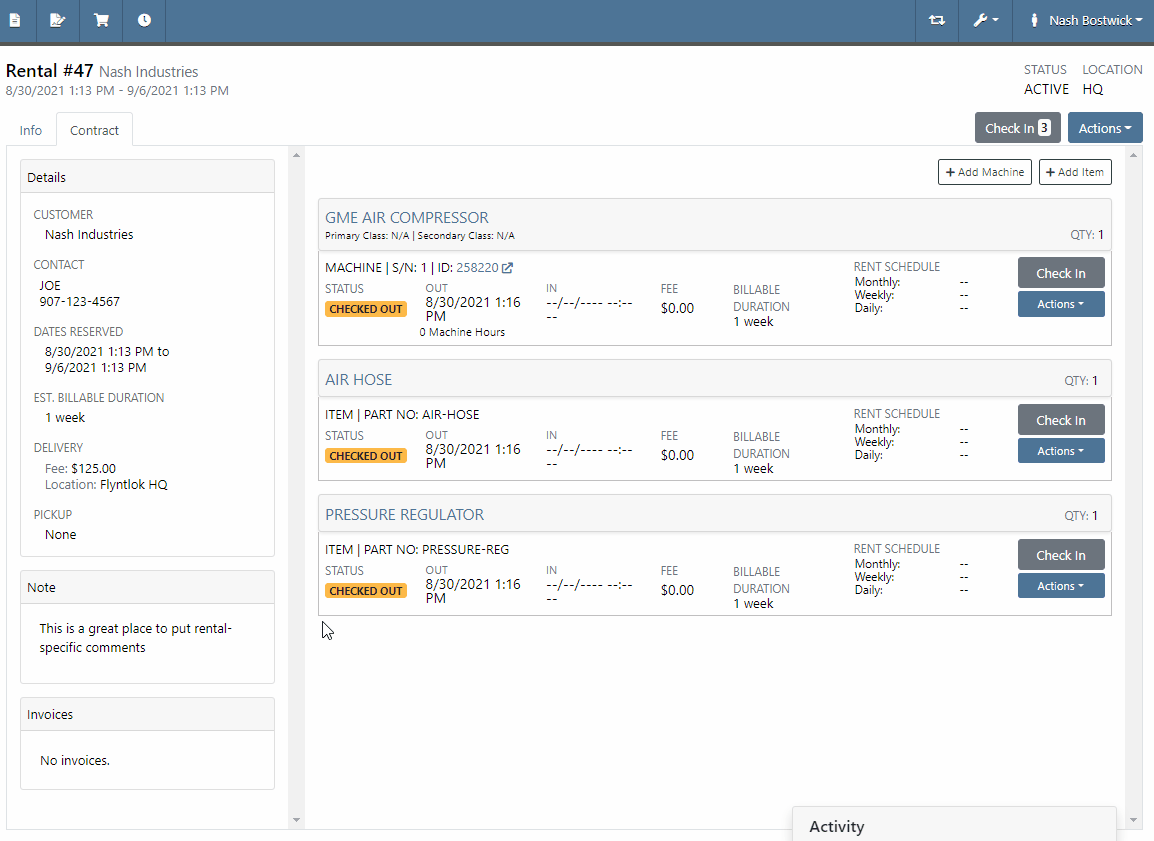
Now that we have our contract, we can reserve and checkout the machines.
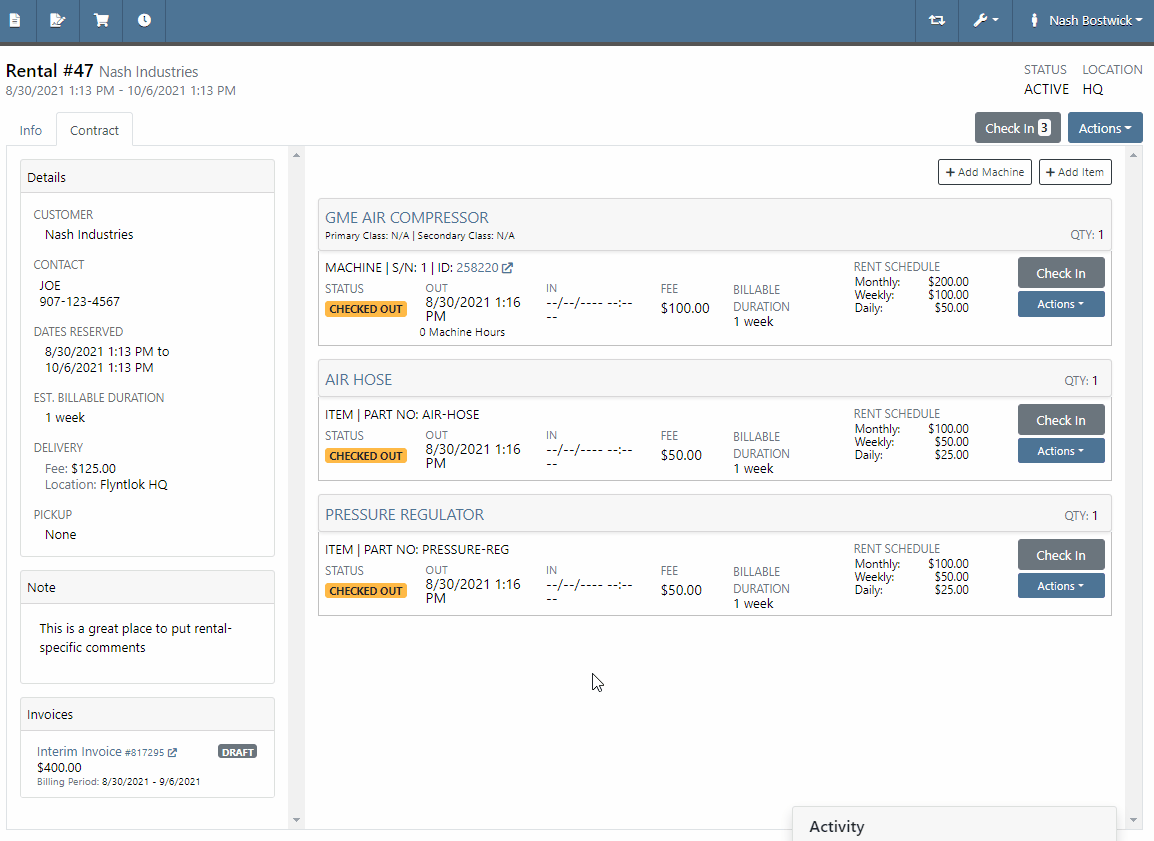
The rental has been started! Lets say that a month has gone by and the customer would like to extend the rental 1 more month. We can adjust the reserved dates then, because a month has gone by, generate a interim invoice.
Its been another month and the rental contract is coming to an end. Its time to check in the machines and send the final invoice! Don't forget to adjust the billing durations. A final invoice will automatically be created.
New Features
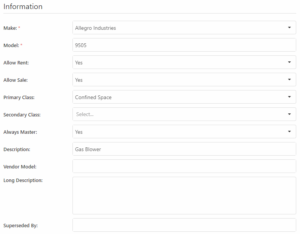
Rentable Items:
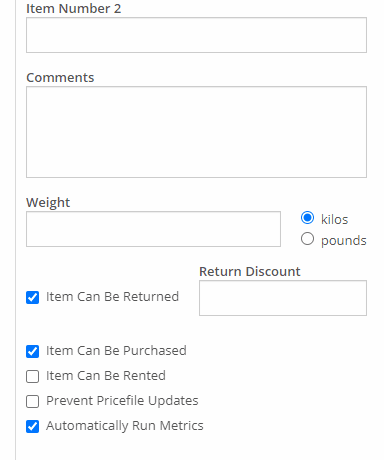
In the above example you may have noticed that the pressure regulator and air hose were listed differently than the air compressor. This happened because the air hose and regulator are rentable items. Unlike machines, rentable items are not tracked by serial number. Rentable items are helpful when you want to rent bulk items. How do you make an item rentable?
Simply edit the item and check the box!
Rental Kits:
Rental Kits are another feature that has been added to the new rental system. In the above example, it would have been easier to build a kit. The air compressor would be the parent machine and the hose and regulator would be child items in the kit. Its key to remember that a kit consists of only one machine, but can have multiple items.
To configure this kit, we will need to go to recommended items section in the air compressor model.
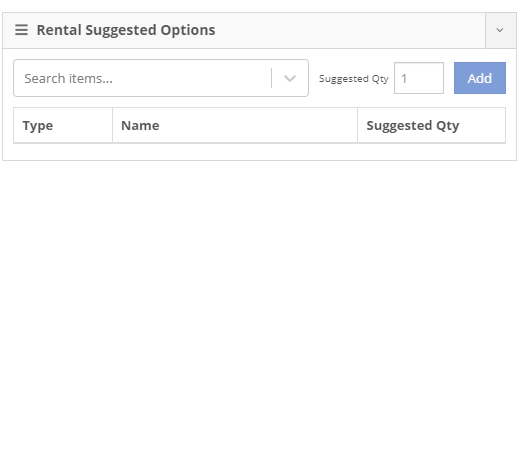
Now, lets add the air compressor to a rental contract. You will be given the option to add items that are configured in the kit. In contrast to machine attachments, adding items is not required.
Machine Classsing:
Earlier, You might have noticed that you were are to filter available machines by primary and secondary classes. You can add classing to a machine by editing the modal. You can add class's by clicking the Wrench -> Machine Classifications.