Flyntlok allows you to create custom inventory counts. The inventory count process is designed to make tallying inventory quick and easy, regardless of the size of your warehouse. Since you usually aren't taking inventory next to a computer, a particular emphasis was placed on making the inventory count system easy to use on a phone or tablet. We've also integrated reports that allow management team members to review all inventory changes before they are reflected in your QOH.
Before we dive into creating inventory counts here are a few terms to familiarize yourself with and a diagram of how those terms relate to each other.
- Sprint: A sprint is your intent to do an inventory count. All data about the inventory count will live within this sprint.
- Plan: Each plan will contain a range of bins that need to be counted. You can assign these plans to one employee. There can be an infinite number of plans per sprint.
- Bin: Bins are the locations of items within your warehouse.

Creating a Sprint
The first step when planning an inventory count is to create a sprint, which is just a period of time devoted to calculating inventory. Sprints will be used to organize and report on the bins being counted and adjustments being made.
Under the admin editors, head to the items tab and then select the Physical Inventory Sprints option.

This takes you to a report of all your previous and current sprints. We'll dig into this report more in the
Reviewing the Plans section. For now, you can create a sprint using the
New Sprint button in the upper left of the page.

Creating Plans
Plans are used to organize the parts that need to be counted by bin location and allows you to assign those bins to an employee for counting. There can be multiple plans created under one sprint. A plan will contain:
- A set and/or range of bins that need to be counted.
- The user that will be executing the plan.
- The date that the plan needs to be done by.
After clicking the New Sprint button, you will create a blank sprint. At the top of the page, clicking the Sprint Name section will allow you to name the sprint. Just to the right of the sprint name, you can see the sprint's status and the date that it was created. You also have the option to check mark the Blind Counts button. Blind Sprint will not show any of the current inventory levels to the employee counting the location.

Note: The bin list will update based on the location that you have selected.
To create a new plan, click the blue plus icon next to Plans. Then, to the right in the Plan Editor section, you can assign a store location, name, due date, assigned employee, and assigned reviewer to the plan.

Note: Only one employee can be assigned to a plan!
Next, you can assign a range of bins to the plan. You have the option to check mark the assigned bins.
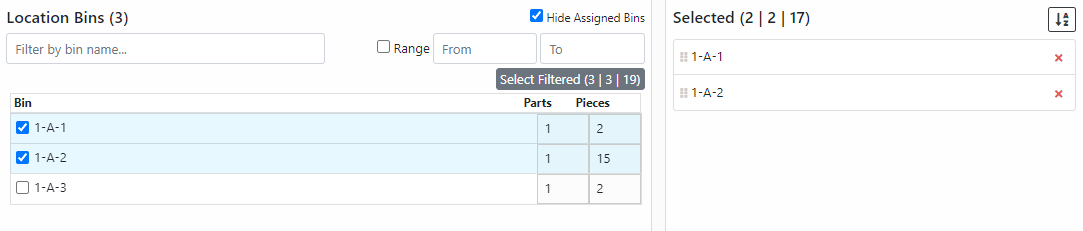
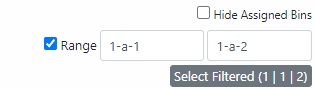
Alternatively, you can input two bins, checkmark the
Range box, and the list of bins will be filtered down to only the bins between those locations.
Once you have all the plans created, click the
Start Sprint button in the upper right. This will create all the plans that you have assigned to this sprint and allows employees to start the inventory count.
Finding Assigned Plans
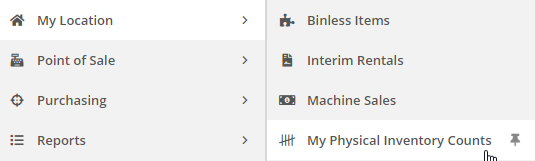
After plans are created, employees can find their assigned plans in the My Physical Inventory Counts tab under the My Location tab on their left navigation.
Note: This report will only show the employee plans that are assigned to them.
Once you are on the report, you will see an overview of all your assigned plans. From here, you can click the plan name and you'll be redirected to the physical inventory count page.
Understanding Plans
On the physical inventory count page, you'll see the name of the plan, the date it was created, its due date, its location, and the user assigned to the plan.

Below this, you'll find all of the bins that are assigned to the plan. Inside each bin, there will be a list of all the items that are assigned to that bin. Each item in the bin has its own line where you can record the quantity.

- The bin location with the number of parts assigned to that location and the quantity of those parts.
- Input for comments on the bin count.
- The item's vendor, number, and description.
- Quantity of the item - this will show the current QOH; if this is incorrect, you'll enter the correct QOH in this box.
- Clicking the error icon will show a text box where you can report a problem with the stock count.
- The checkmark is used to confirm that the current QOH matches the count.
Executing the Count
When counting parts, there are three actions that can be taken after the part is counted.
- If the current QOH is correct for the item, click the checkmark icon. The line will then turn green to indicate that the part has been counted and that it matches what Flyntlok reports as your QOH.

- If the count does not match what is shown as your current QOH, change the number in the Qty box to the actual count. The line will then turn orange. This indicates that the part has been counted and that the counted amount does not match what Flyntlok reports as your QOH. DO NOT CLICK THE CHECKMARK AFTER CHANGING THE QOH. Clicking the checkmark after adjusting the quantity will remove your adjustment and confirm that the actual count matches the QOH.

- If there is an issue with the bin location or part - e.g., the bin location doesn't exist or is numbered incorrectly - you can click the warning icon just to the right of the Qty box to report a problem. When a problem is reported, the line will turn red.

Note: You can still mark the part as counted and correct or adjust the quantity based on what is counted. The line will remain red to indicate that a problem was reported.
After all the parts on the plan are counted, clicking the submit button in the upper right will lock the plan down and make it un-editable.
Note: Final QOH adjustments will not happen until all plans are submitted and the sprint is marked as complete.
Reviewing the Plans
Anytime during the inventory count process, you can return to the Sprint Dashboard and review all inventory changes. Next to the Start Sprint, click the downward-facing arrow and select View Variance Report to be taken to a report that reflects all the adjustments that have been made during this sprint so far.
The variance report will only show items that had the QOH adjusted. Any items that had the correct QOH will not be on the report.
Note: The variance report is grouped by sprint->store location->plan->bin. This will give you a granular breakdown that can be filtered for specifics. Some notable columns on this report are:
- Expected: This will be the QOH of the item when the plan was created.
- Expected Total: The average cost or cost of the item multiplied by the expected amount. This column will have a sum of your current QOH at the bottom.
- Actual: The amount that was counted and reported for the item.
- Actual Total: The average cost or cost of the item multiplied by the actual amount. This column will have a sum of the actual amount at the bottom.
- Variance: The difference between your expected and actual count. This will be totaled at the bottom to show the amount that your inventory changed.
- Vari Total: The average cost or cost of the item multiplied by the variance amount. This column will be summed at the bottom to show the total cost of variance from the counts.
Marking a Sprint Complete
Once all plans in a sprint have been marked complete, the sprint can also be marked complete.
To mark the sprint complete and execute all the inventory adjustments, you will need to go to the sprint dashboard. Once there, you can click the Finish Sprint button in the upper right.

Note: As stated earlier, once the sprint is marked complete, all inventory adjustments will take place. Parts that didn't have their inventory adjusted in the sprint will still be marked in their transactions to show that they were counted. This may take some time so please stand by until the blue button in the upper right shows Completed.
Inventory Sprint Tips
Here are a few things to note when going through the inventory count process:
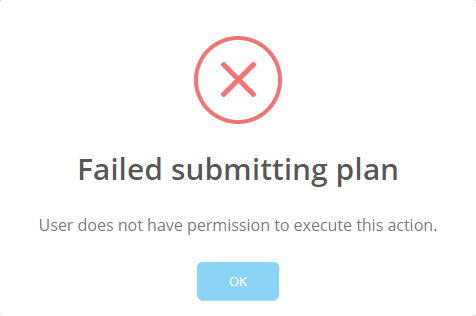
- There are permissions in place around the submission both of plans and of sprints. If you don't have the necessary permissions, an error will show. Management team members have the ability to set these permissions. If you need assistance with this, please reach out to Flyntlok!
- On a plan, you have the ability to search for parts in the plan, or filter by unchecked items, adjusted items, or unchecked and adjusted items.

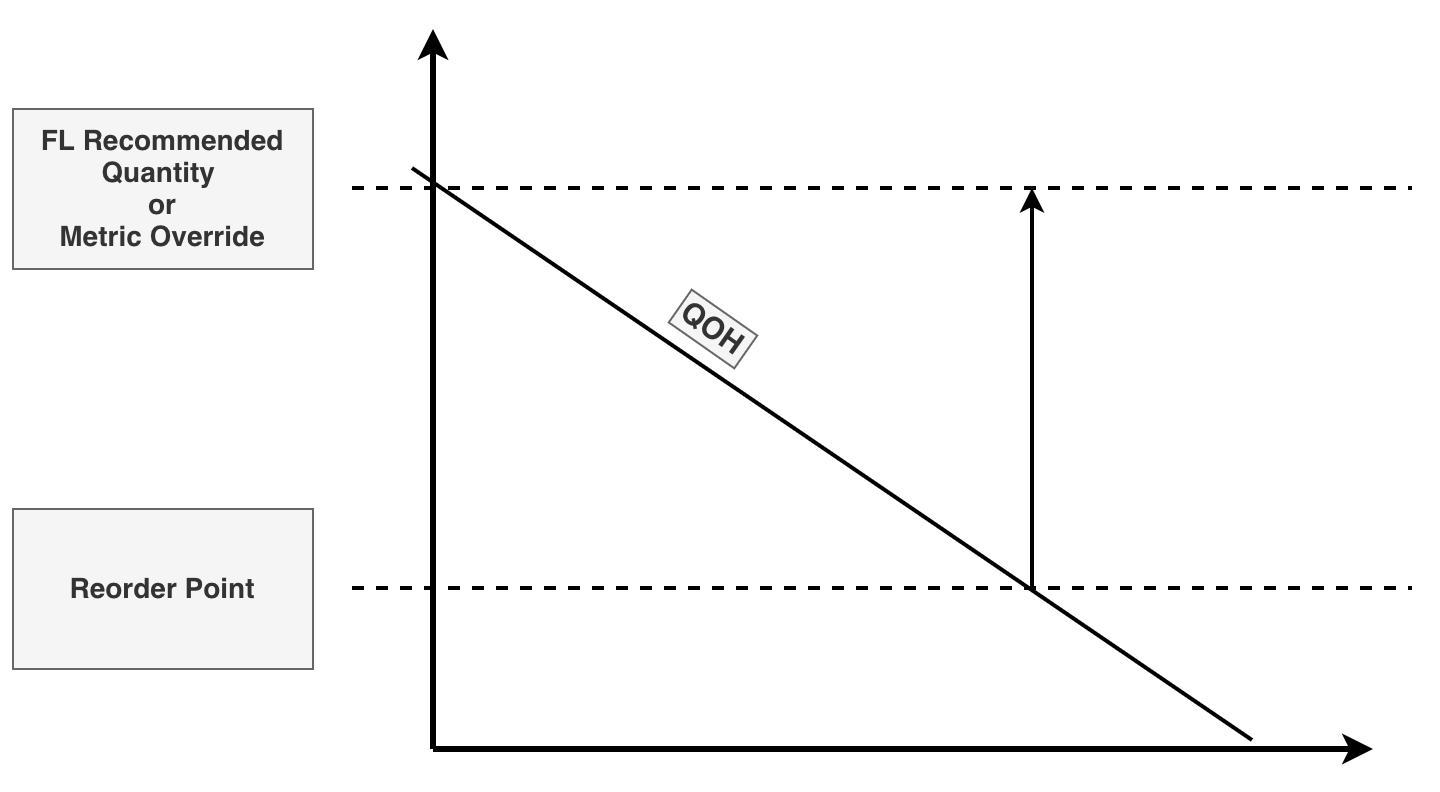
Reorder point (ROP) is the level of inventory that triggers Flyntlok to recommend a replenishment of that particular inventory. When your quantity on hand (QOH) reaches your ROP, Flyntlok will recommend you order enough stock to bring your QOH up to your recommended quantity (Flyntlok Calculated) or if set, your metric override.
- Go to the item's dashboard.
- Click on the 'Actions' dropdown.
- Select "Review Transactions".
- Select the location you want to review.
- Here you will see the full transaction history for the item in the location selected.
- First, go to the item dashboard of the item you want to transfer and click Transfer This Item under the actions drop-down.
- Next, enter the Transfer from and Transfer to locations and the transfer quantity. You can also assign the transfer to an invoice under the Assign to invoice drop-down.
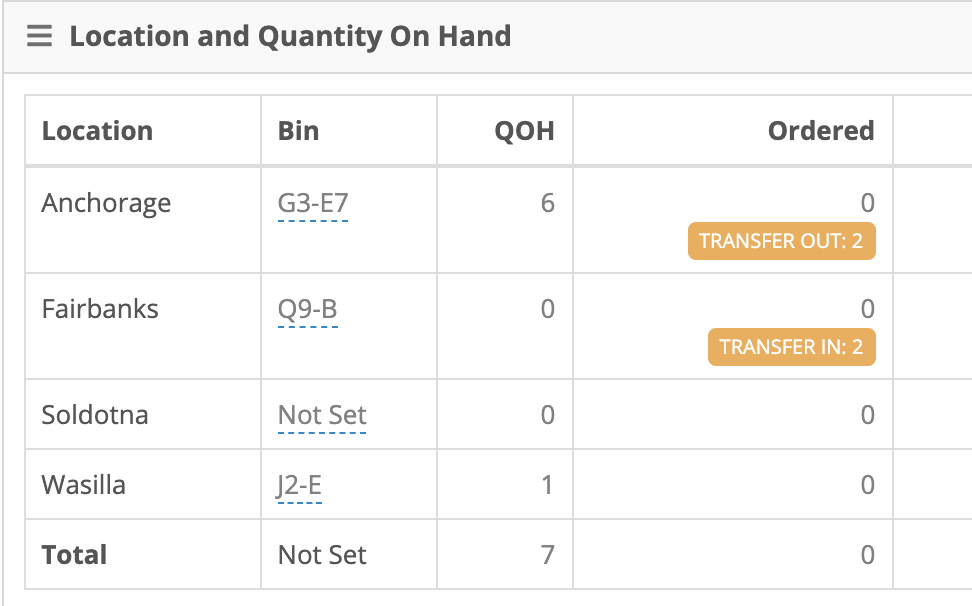
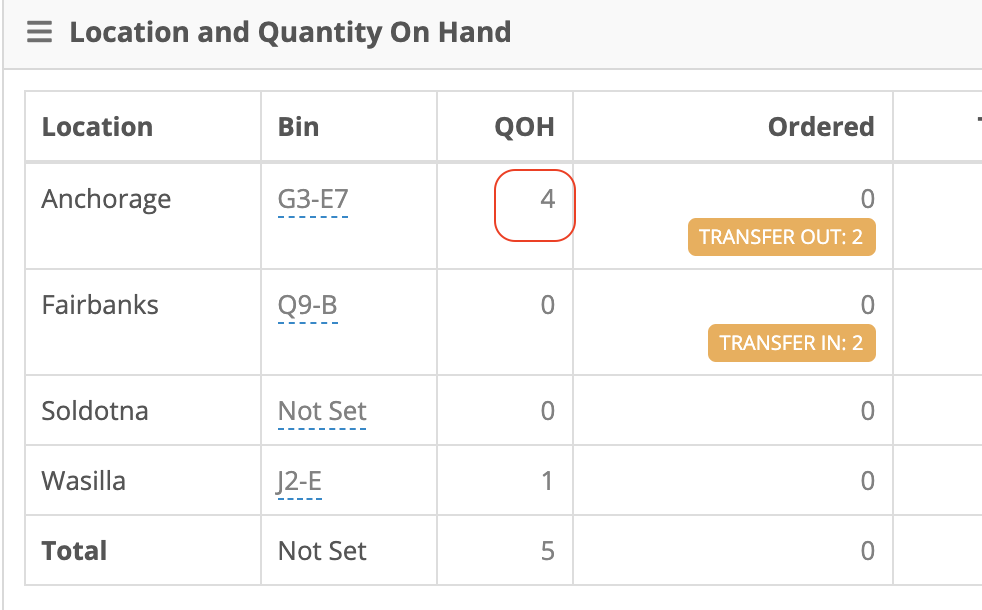
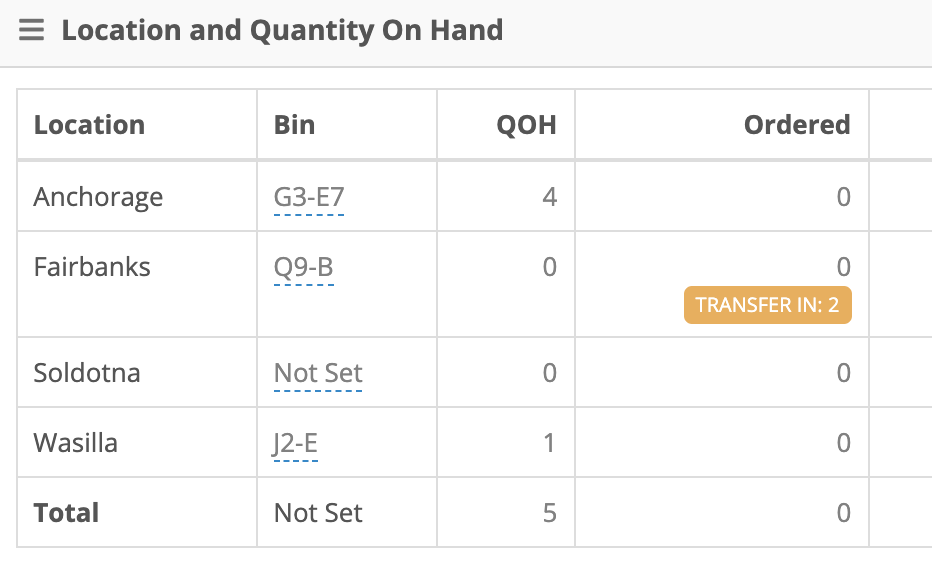
- Notice the transfer out and in quantities under the Location and Quantity on Hand module.
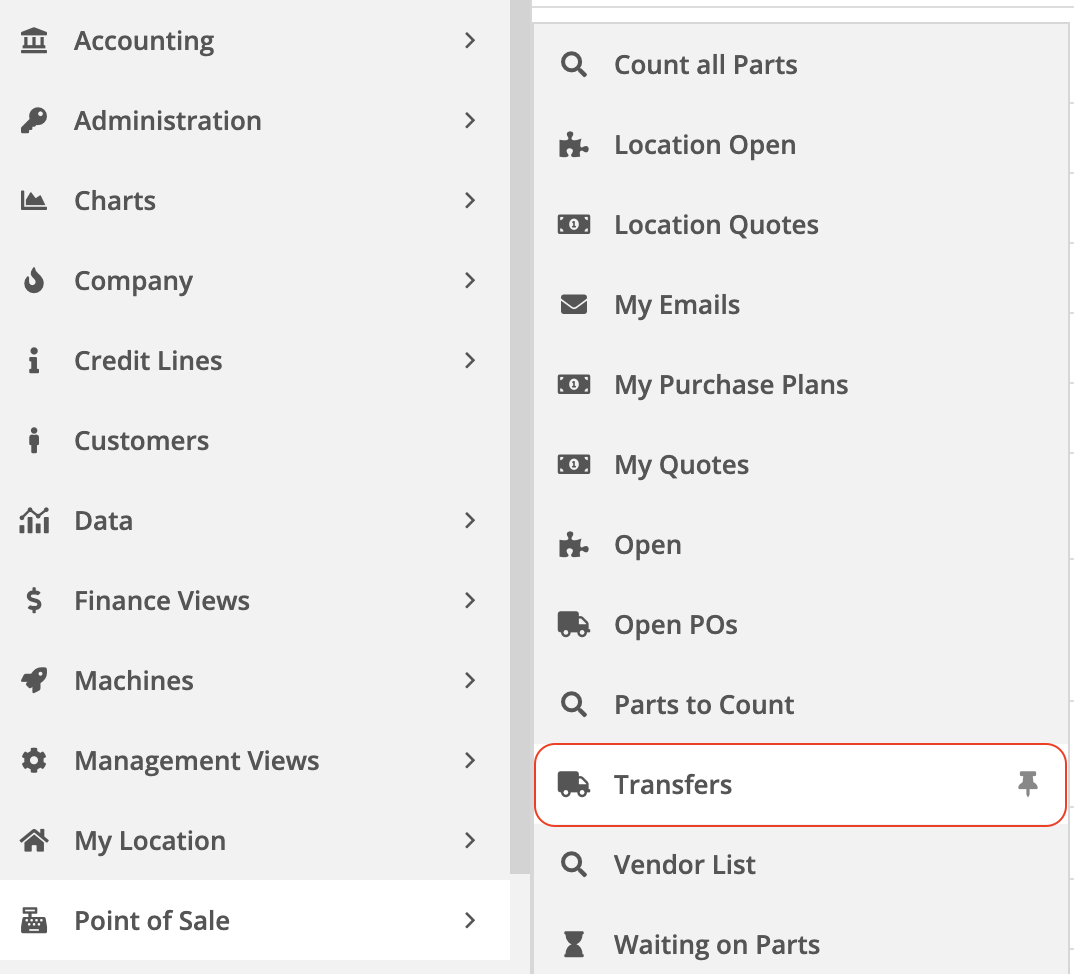
- Now go to your left-hand menu -> Point of Sale -> Transfers to see a full list of transfers at your company.
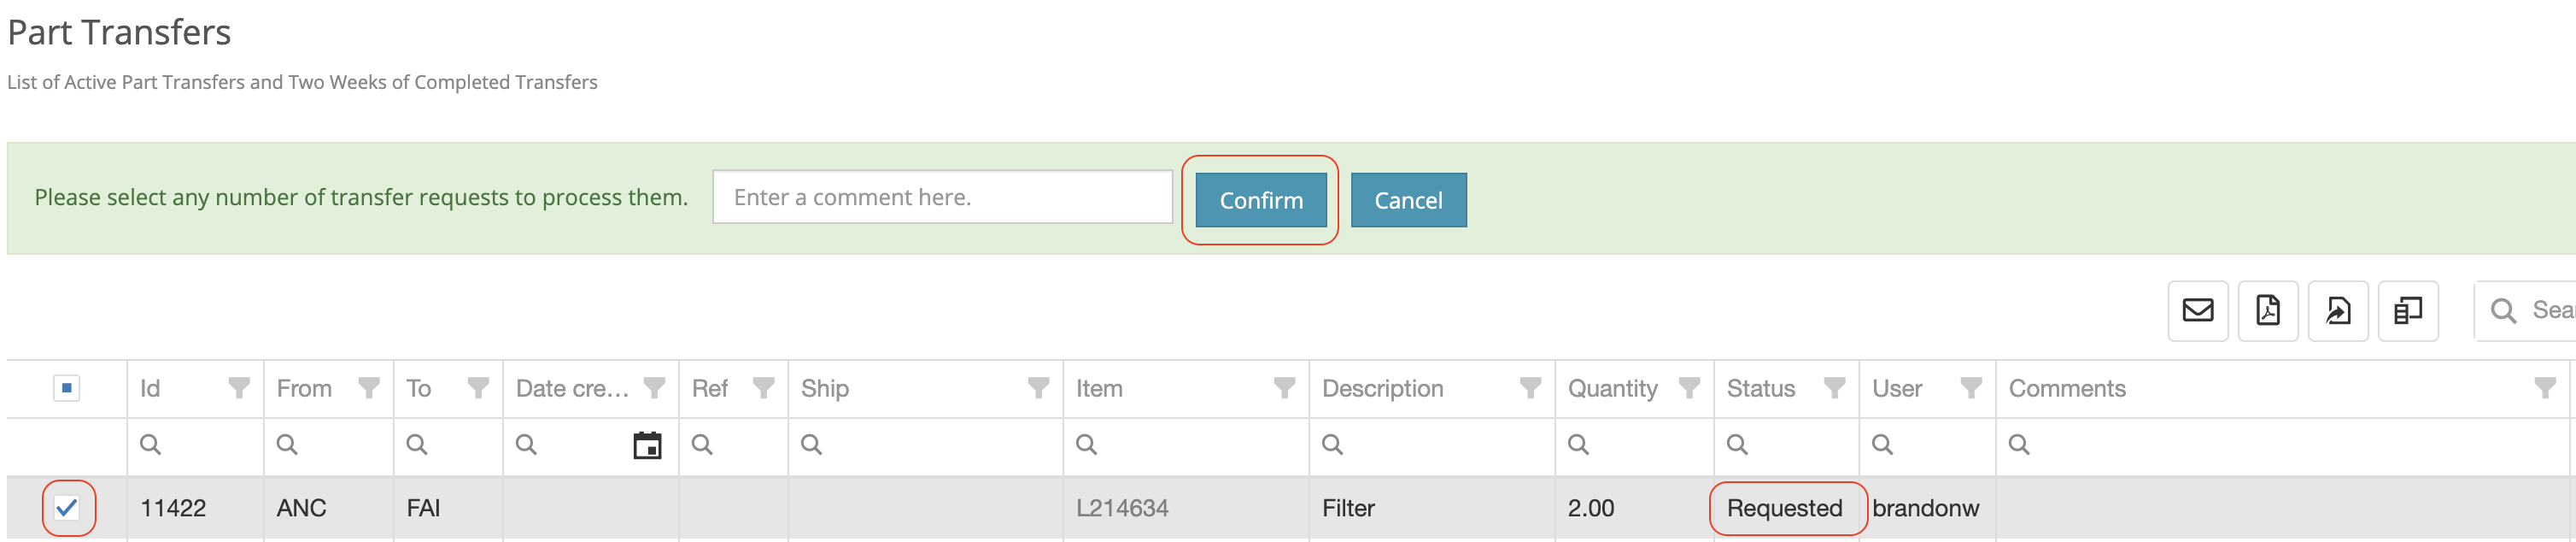
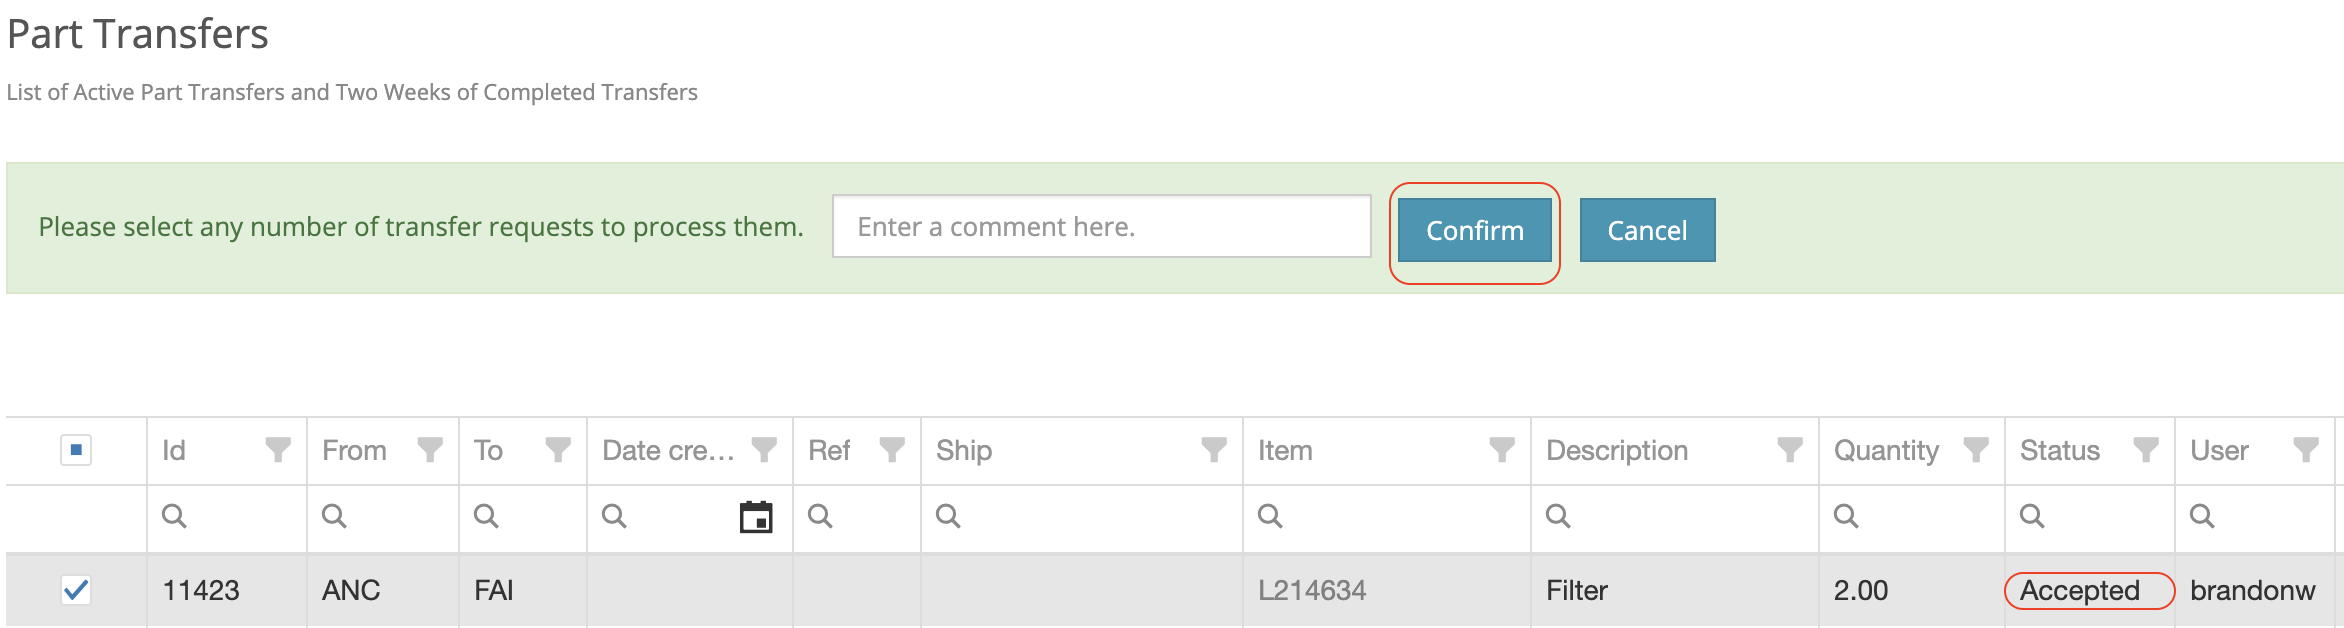
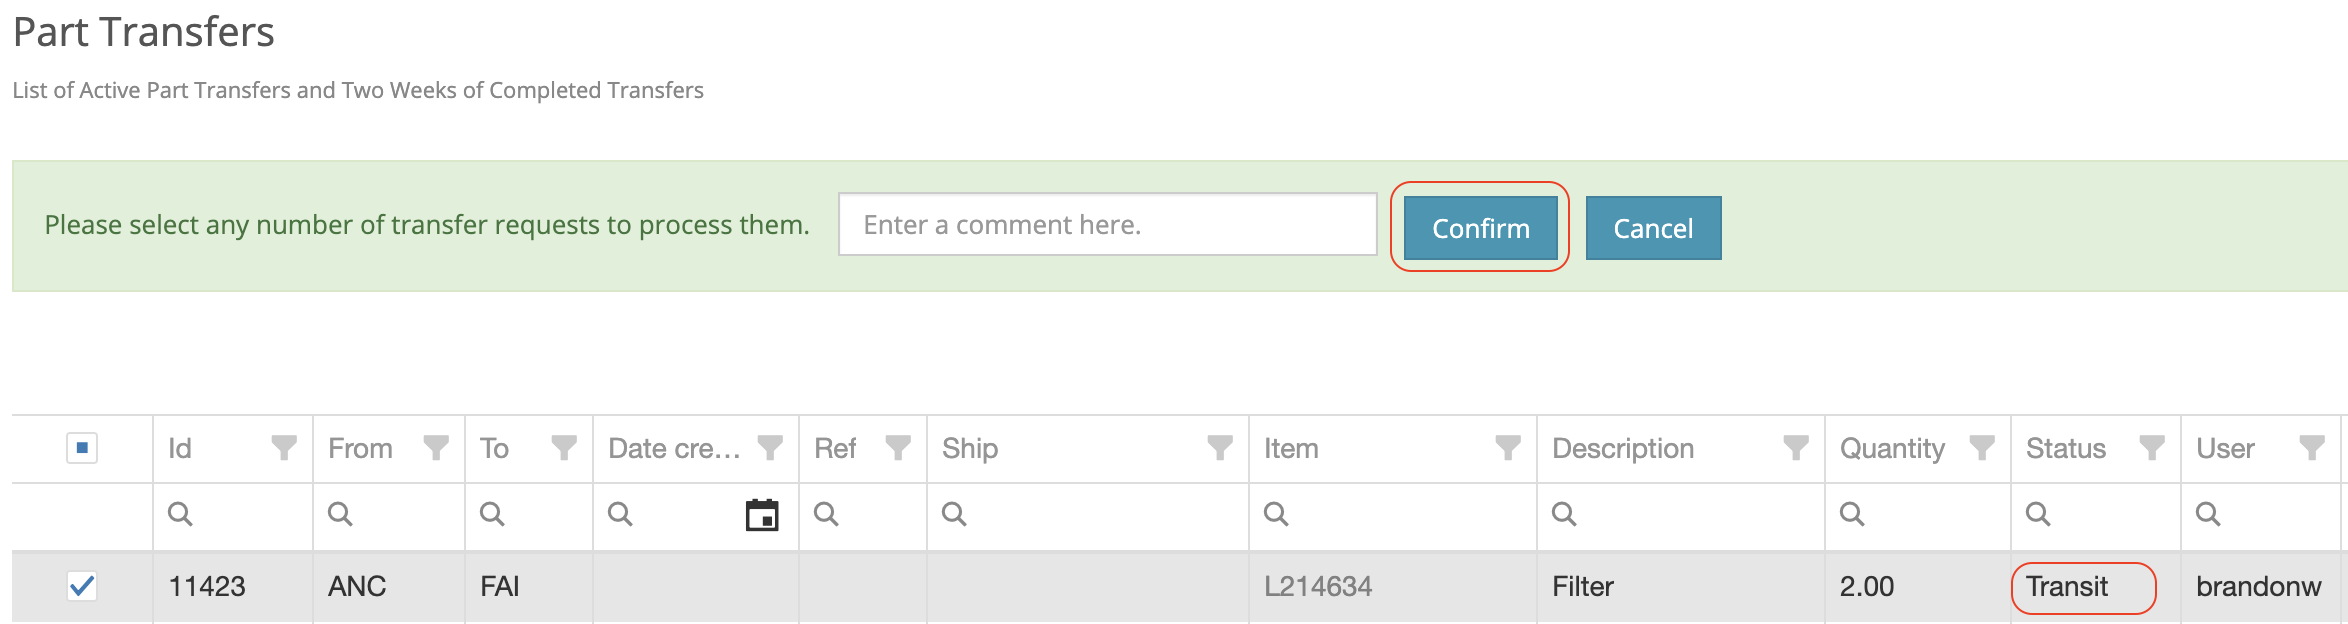
- The user at the Transfer from location can accept this transfer by clicking the check-box next to the transfer and then the Confirm button. This will move the transfer to an Accepted status.
- Back on the item dashboard, you can see the QOH was depleted from the Transfer From location.
- After the transfer has been shipped, the user at the Transfer from location will now go back to the transfers report to move the transfer into Transit status.
- Once the Transfer to location received the part(s), the user at the Transfer to location will go to the transfers report and move this transfer into Received status.
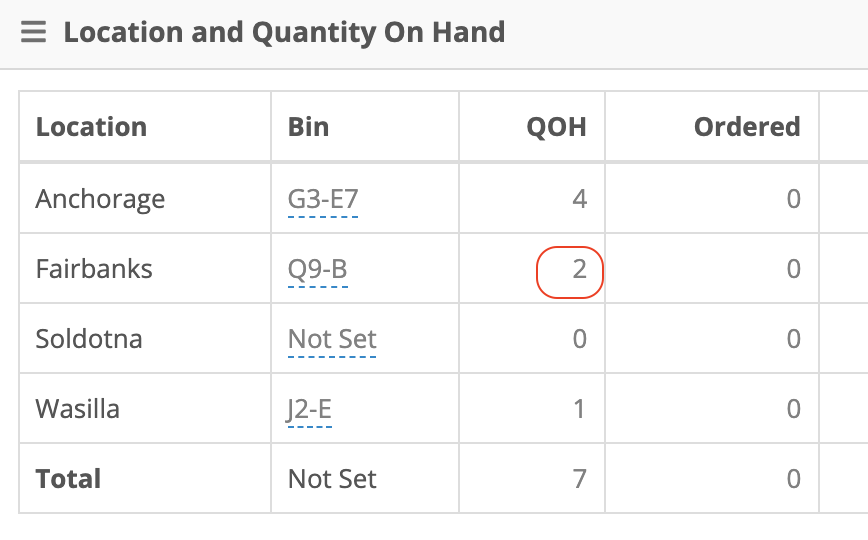
- Notice the QOH at the Transfer to location updated. (If this was linked to a sales order, this quantity would not update. Instead, it would update the Ready quantity of the invoice it was linked to.)
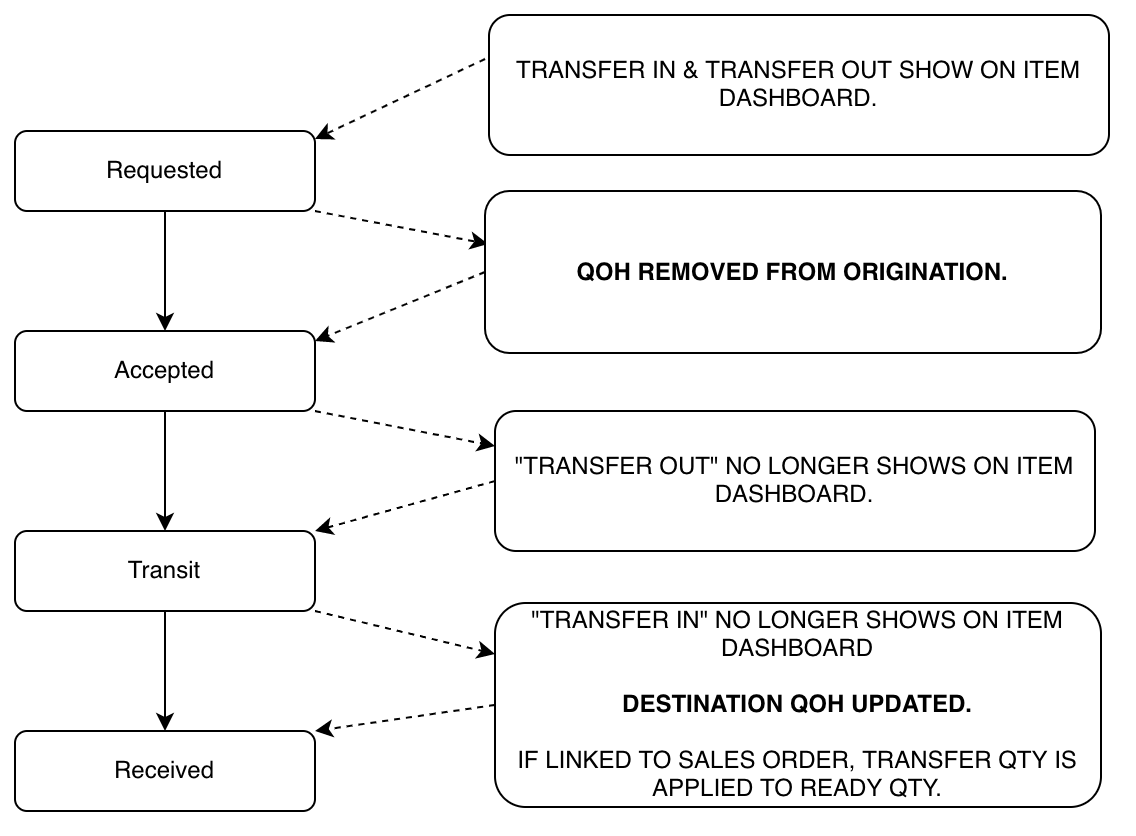
- Here's a helpful chart to visualize the transfer process.
Quick Item Transfers
You now have the ability to transfer an item directly from a sales order! Previously, this could only be done from the item dashboard. After adding an item to the sales order that needs to be transferred to your location, you will see a truck icon next to the QOH of the item.

Clicking this will bring up the transfer information box. In this form, fill out how much, from where, your comments, your preferred shipping method (for the transfer), and whether or not this should be drop-shipped to the customer. This will queue up a request to transfer the item to your location.
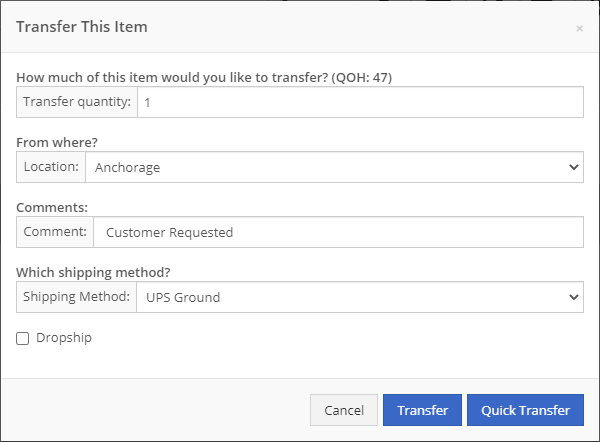
NOTE: The quick transfer button will move your inventory instantly from one location to the next. This means upon clicking this button the QOH is immediately removed from the source location and moved to the destination location (your invoice location). This bypasses all the current transfer workflows in place, but will still create a record of the transfer.
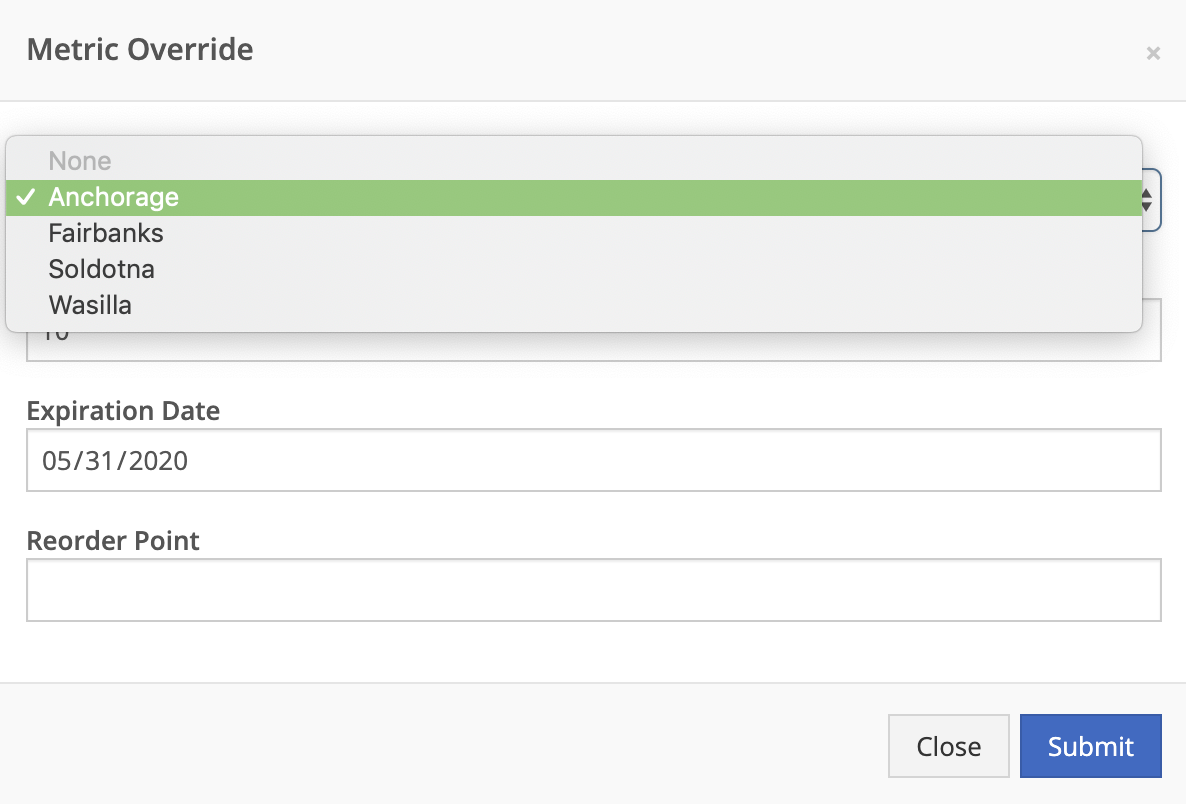
Changes to inventory and average cost occur through the actions drop-down menu. There are new action drop-down options for Metric Override, Scrap Part, and Change QOH. Change QOH also allows you to edit the average cost.
This is particularly helpful if you decide you need to change units of measure.
Metric Override now also allows you to set a reorder point by location (you used to have to set it for your whole enterprise). The part ordering engine checks to see if you have set it at the location level. If it is not set there, it will look to the enterprise level to see if there is an applicable reorder point.
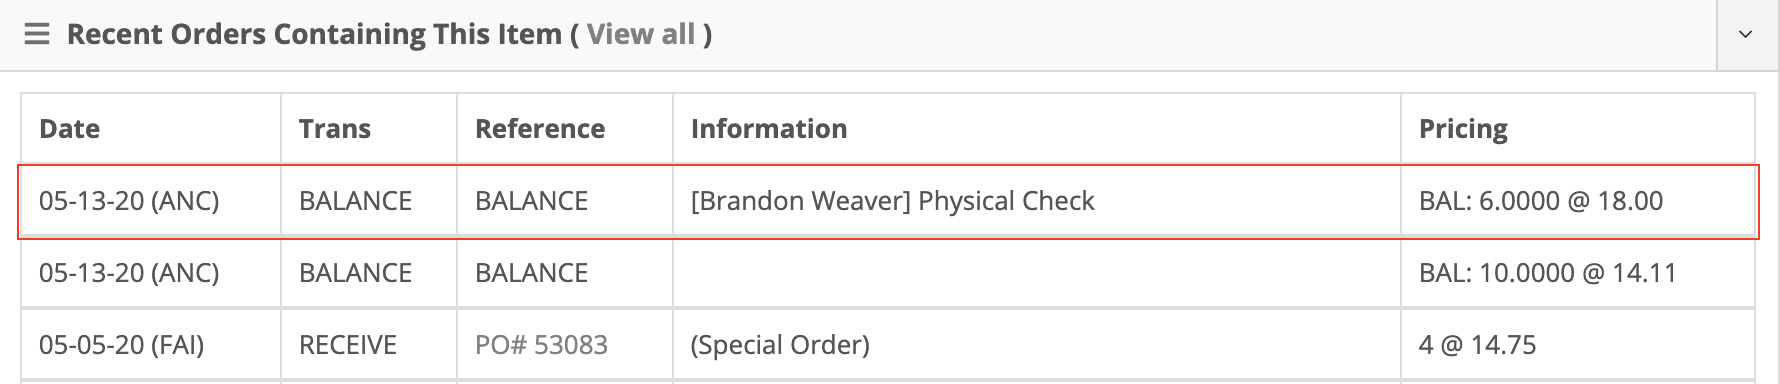
When a change is recorded, the Recent Orders view on the item dashboard will now show who made the change, the reason for it, and the new quantity and average cost recorded.
- General: This section is where you can change the item number, description, comments, and weight. Also, you can declare whether the item can be purchase or returned here.
- Cores: From here you can link an item to its core and dirt core. If the core parts don't exist in the system, you can create them from here.
- Grouping: You can associate an item with a Department or Division. The item can also be added to a group with an assigned quantity. When a group is added to a sales order, all items linked with that group will be added to the sales order with their quantity assigned.
- Units: An item can have different purchasing/base/selling units. For example, if you buy oil in gallons but sell it in quarts, that can be set up here and the system will adjust QOH accordingly.
- Purchasing: In this section, you can set the cost of the item and the package quantity that the item must be ordered in.
- Retail: The list price and MSRP can be set here.
- Supersessions: You can add parts that supersede or that this part is superseded by here. Also, you can set alternate items that can be used in place of the one you are editing.
An item type determines if an item can be sold, purchased, and more!
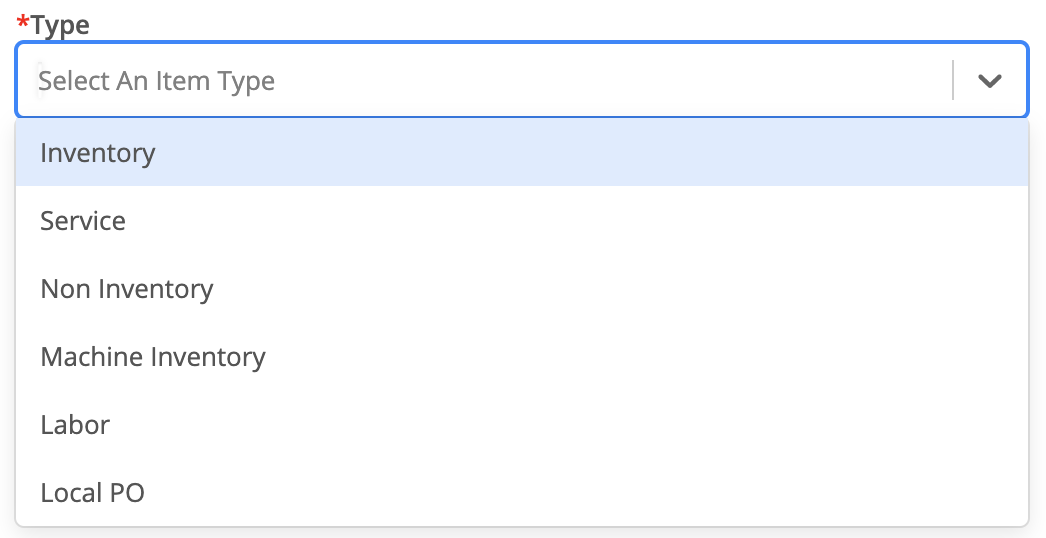
- Inventory: Parts for sale
- Service: Services for sale
- Non Inventory: Items that don't have inventory tracked.
- Machine Inventory: Items that get assigned to machine income accounts.
- Labor: Items that are used to track labor.
- Local PO: Local parts and services in need of a PO. (Po will auto-generate)
There are many more configurations that can be created for these item types based on your needs!
- Go to the New drop-down on the left navigation bar.
- Click on the Item tab.
- From here you can create your new item. The fields with a red asterisk next to them are required.
Note: If the item's vendor is not in the vendor drop-down, then that vendor must be created.